Compare Surface Laptop Ultra reviews, touchscreen MacBook Pro and other Windows devices. Plan local AI development and separate Windows desktops for your team.
Compare touchscreen MacBook Pro hands-on reports, Surface Laptop Ultra and other Apple devices. Plan local AI work and a global Windows team with Jump-IT.
Compare GPT-6.1 Terra launch data and reviews, then plan a Windows workflow with Jump-Desk and Jump-Teams from supported Mac, Linux, iPad or phone clients.
Compare Windows 10 ESU, a local upgrade and a Windows 11 cloud PC. Rehearse your business applications, check supported devices and budget the full cost.
Plan a contractor’s Windows workspace from setup to handover: Team roles, Windows privileges, project files, application access and monthly cost review.
Watch a Team member accept an invitation, find their Jump-Desk, review connection settings and open Windows with their own account and connection file.
Watch a first-member onboarding demo: create a Jump-Team, choose permissions, send an invitation and hand over a Windows cloud PC with individual access.
A practical Jump-Teams onboarding guide for small-business owners: invitations, permissions, Windows desktop assignments, funding and a repeatable handover.
Run compatible Windows apps from your Mac through a Jump-Desk cloud PC. Follow setup and connection steps, and compare cloud access with a local virtual machine.
Start with your existing device, the official connection app and a Windows application you can test. The setup flow lets you review your desktop choices before checkout.
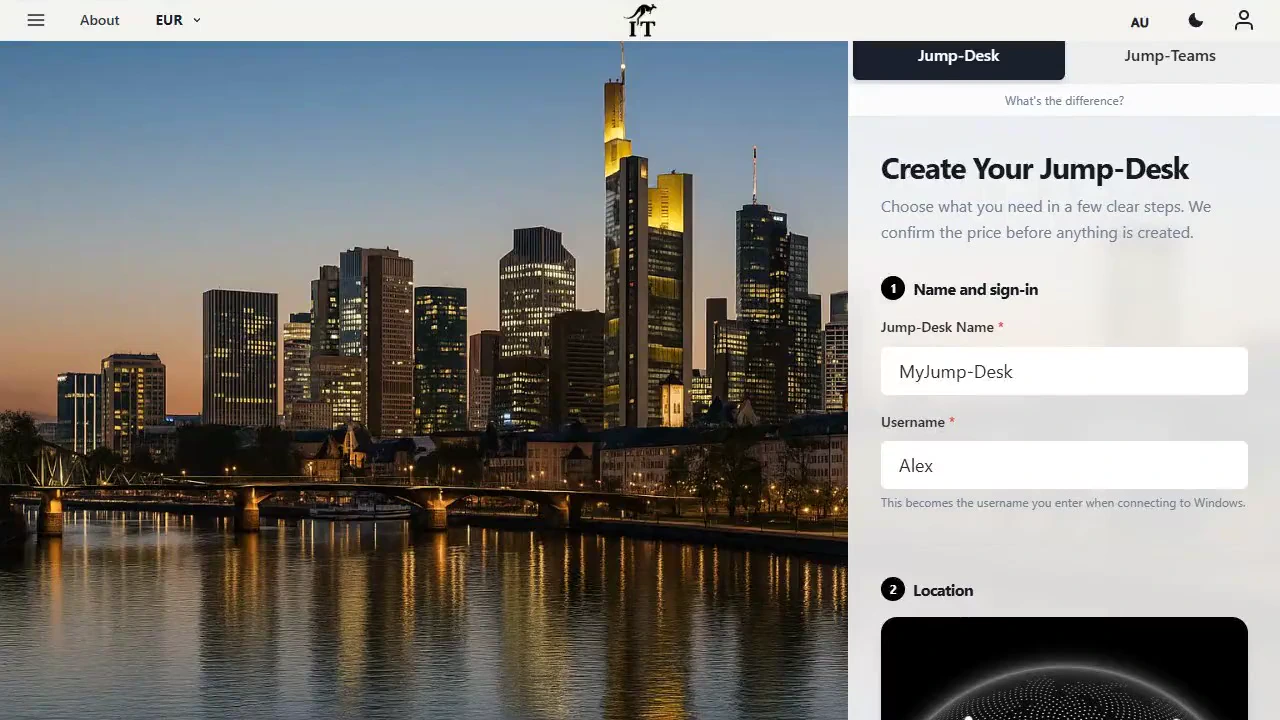
Jump-Desk setup: desktop name, Windows username and location. Product capture with demonstration data. Select to enlarge.
Jump‑Desk tutorials, in one place
Find practical instructions for creating, connecting to and using a Jump‑Desk: a Windows 11 Pro cloud desktop. Each article focuses on one task and includes the relevant requirements, setup steps and troubleshooting guidance.
Product definition
What is a Jump‑Desk?
A Jump‑Desk is a Windows 11 Pro cloud desktop created and managed through Jump‑IT. You choose an available location, billing option and performance tier, create the desktop, then connect using a compatible remote desktop client.
The How‑To library explains the device-specific steps. Live regional availability, pricing, included usage and checkout terms are shown in the Jump‑IT app and take precedence over older screenshots or examples.
Billing optionsHours, Months or Years
Performance tiersStandard, Pro or Pro+
Operating systemWindows 11 Pro licence included in the current tiers
Illustrative workspace.
About this How‑To library
Prepared and maintained by the Jump‑IT Team. Reviewed 8 September 2026 against the current Jump‑IT frontend, WordPress page hierarchy and published iPad workflow.
Product behaviour, client requirements and regional availability can change. Check the relevant guide’s update date and use the live Jump‑IT app as the source of truth for pricing and account-specific status.
SEE THE PRODUCT IN ACTION
From the first choice to the next working session.
These recordings show the current Jump-IT interface with demonstration data. Use the controls to pause, replay or view a recording full screen.
PRODUCT WALKTHROUGH27 seconds
Create your Jump-Desk
Name your desktop, choose a region and plan, and review the configuration before checkout.
Read the walkthrough
Start with your Windows sign-in After signing in to Jump-IT, give the desktop a name. This username is for Windows.
Choose a nearby region Pick from the regions available to your account. Your desktop will run in that region.
Choose how you use it This example uses Monthly. Review the current price and included uptime before checkout.
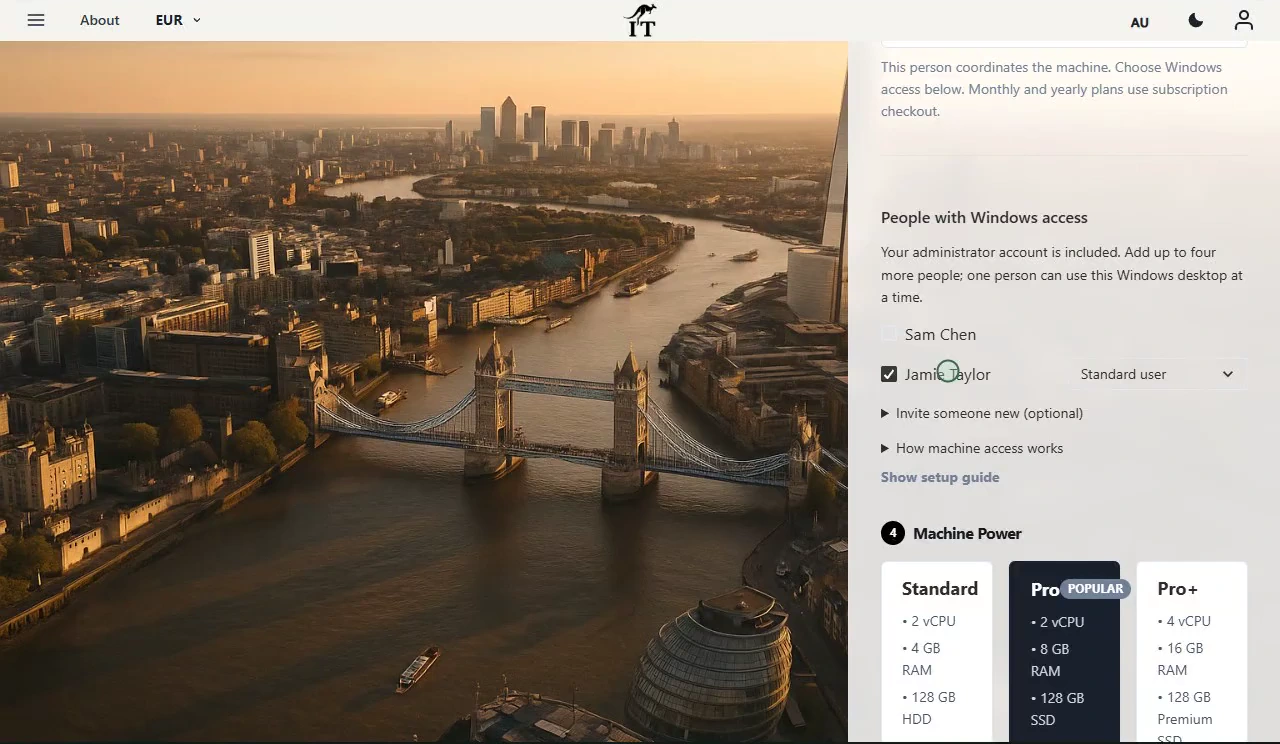
Choose the power for your work Compare the available CPU, memory and storage. Example prices are shown in this recording.
Review before you pay Check the total and terms, then continue to checkout. This demonstration stops before payment.
PRODUCT WALKTHROUGH31 seconds
Set up your laptop connection
Find the display settings, adapt the connection to your screen, and download the connection file.
Read the walkthrough
Find your desktop controls The settings menu sits on your desktop card. Open Connection Settings.
Fit Windows to your screen Review full-screen, monitor and resizing options. Support depends on your remote desktop client.
Choose your display preference Smart sizing fits the remote desktop to the client window. Other settings can stay at their defaults.
Keep the settings and connect Select Done, then Connect. The settings are included in your next connection file.
Open the file in your client Choose Download & Connect, then open the file with a supported remote desktop app.
Continue on your computer Sign in to the remote desktop with your Windows account. This final step is a connection guide.
Review the desktop configuration before checkout. Demonstration data. Open the image to inspect the controls.
CURRENT WORKFLOWS · SEPTEMBER 2026
AI-assisted work can still include a Windows-only step.
An assistant can help draft a report, explain a formula or plan a workflow, while the final task still depends on a Windows desktop application, plug-in or client system. Start with that application and its requirements. A browser-based assistant alone is not a reason to add another computer; a compatible Windows-only workflow may be.
A retained Jump-Desk keeps that Windows environment available between sessions. For colleagues doing the same kind of work, Jump-Teams adds invitations, roles and desktop assignments. AI subscriptions, Microsoft 365 and other paid applications require their own licences; a cloud PC does not include those subscriptions or promise specialist GPU hardware.
Bring people and desktops together.
Read the business guide to invitations, roles, funding and desktop assignments.
Windows access choices and Standard, Pro and Pro+ performance tiers. Demonstration data.
Prepaid Hours: budget for both parts.
Eligible Hours desktops use prepaid funding. Compute charges apply while running, and the separate service charge continues while the desktop is retained. Stopping the desktop preserves its files and ends running compute charges; deleting it permanently removes the desktop. Review the wallet, current rates and funding permissions in Jump-IT before creating one.
For regular work, Months includes up to 300 hours of uptime per desktop each month. Review the current Years option when a longer commitment suits the requirement. Each desktop has its own plan, region and performance tier.
Use the live Jump‑IT app to choose your region, billing option and performance tier. Then return to the relevant guide for the device-specific connection steps.