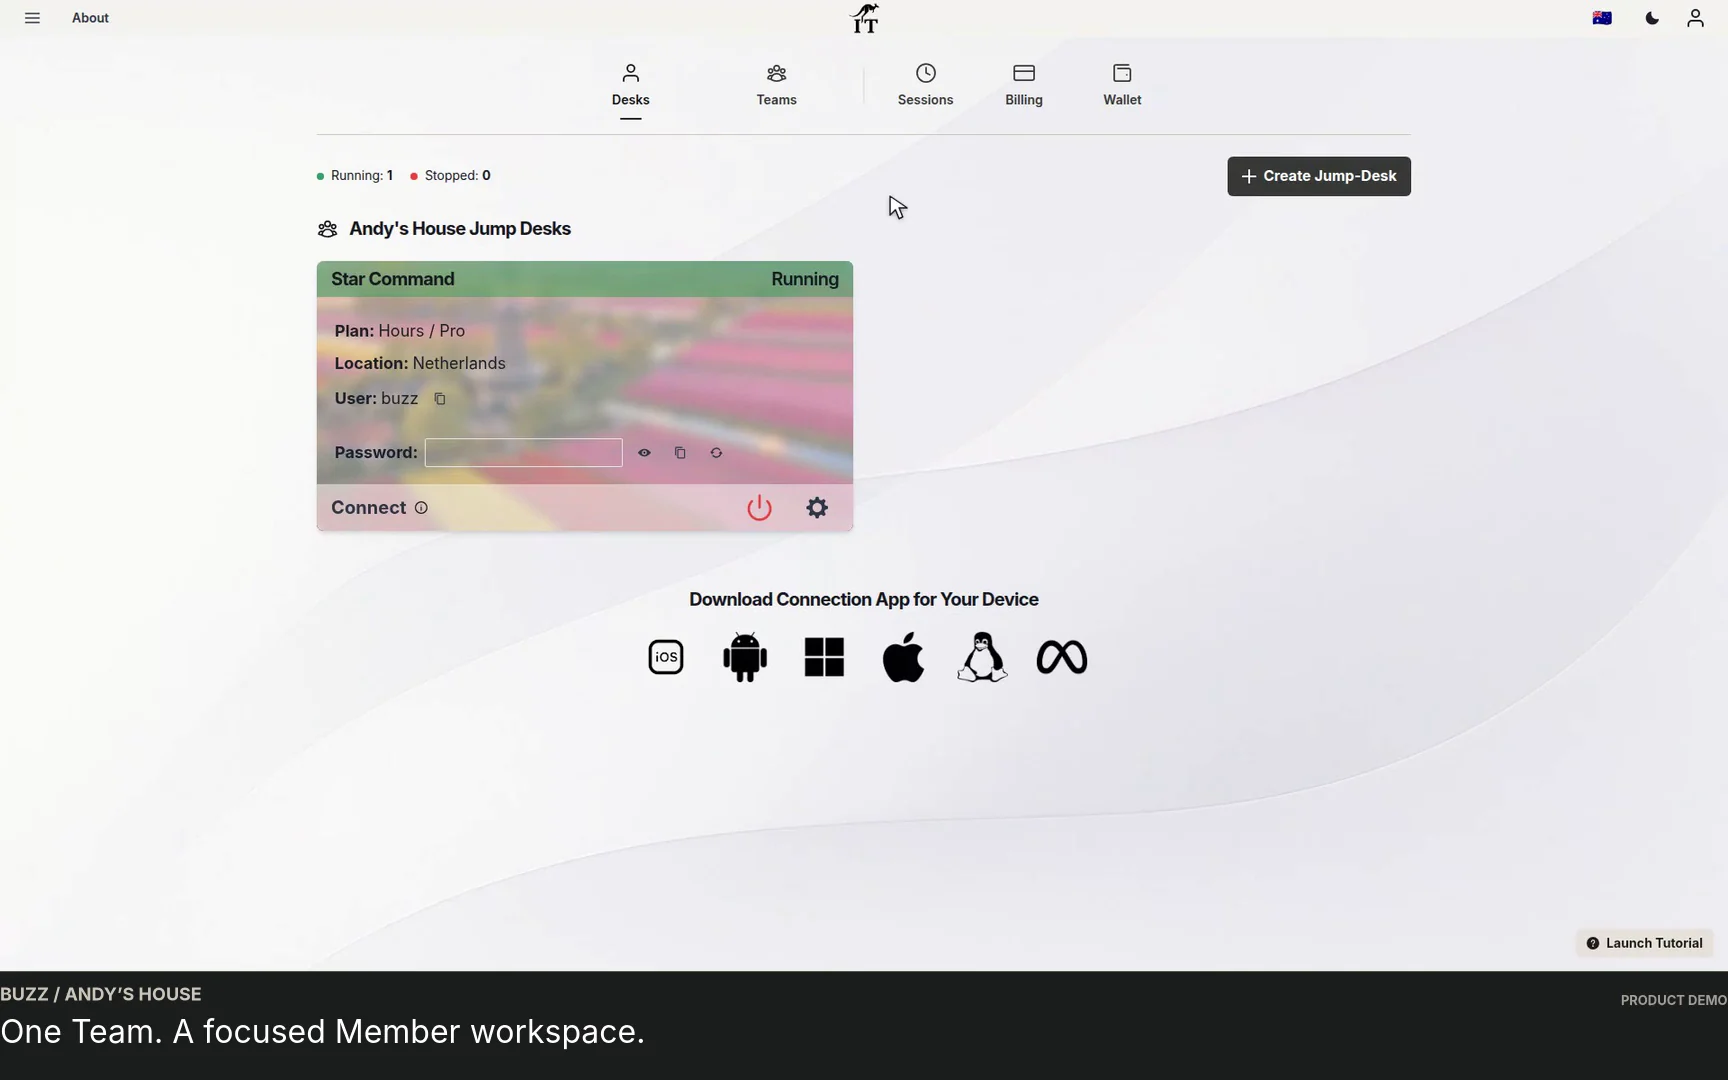
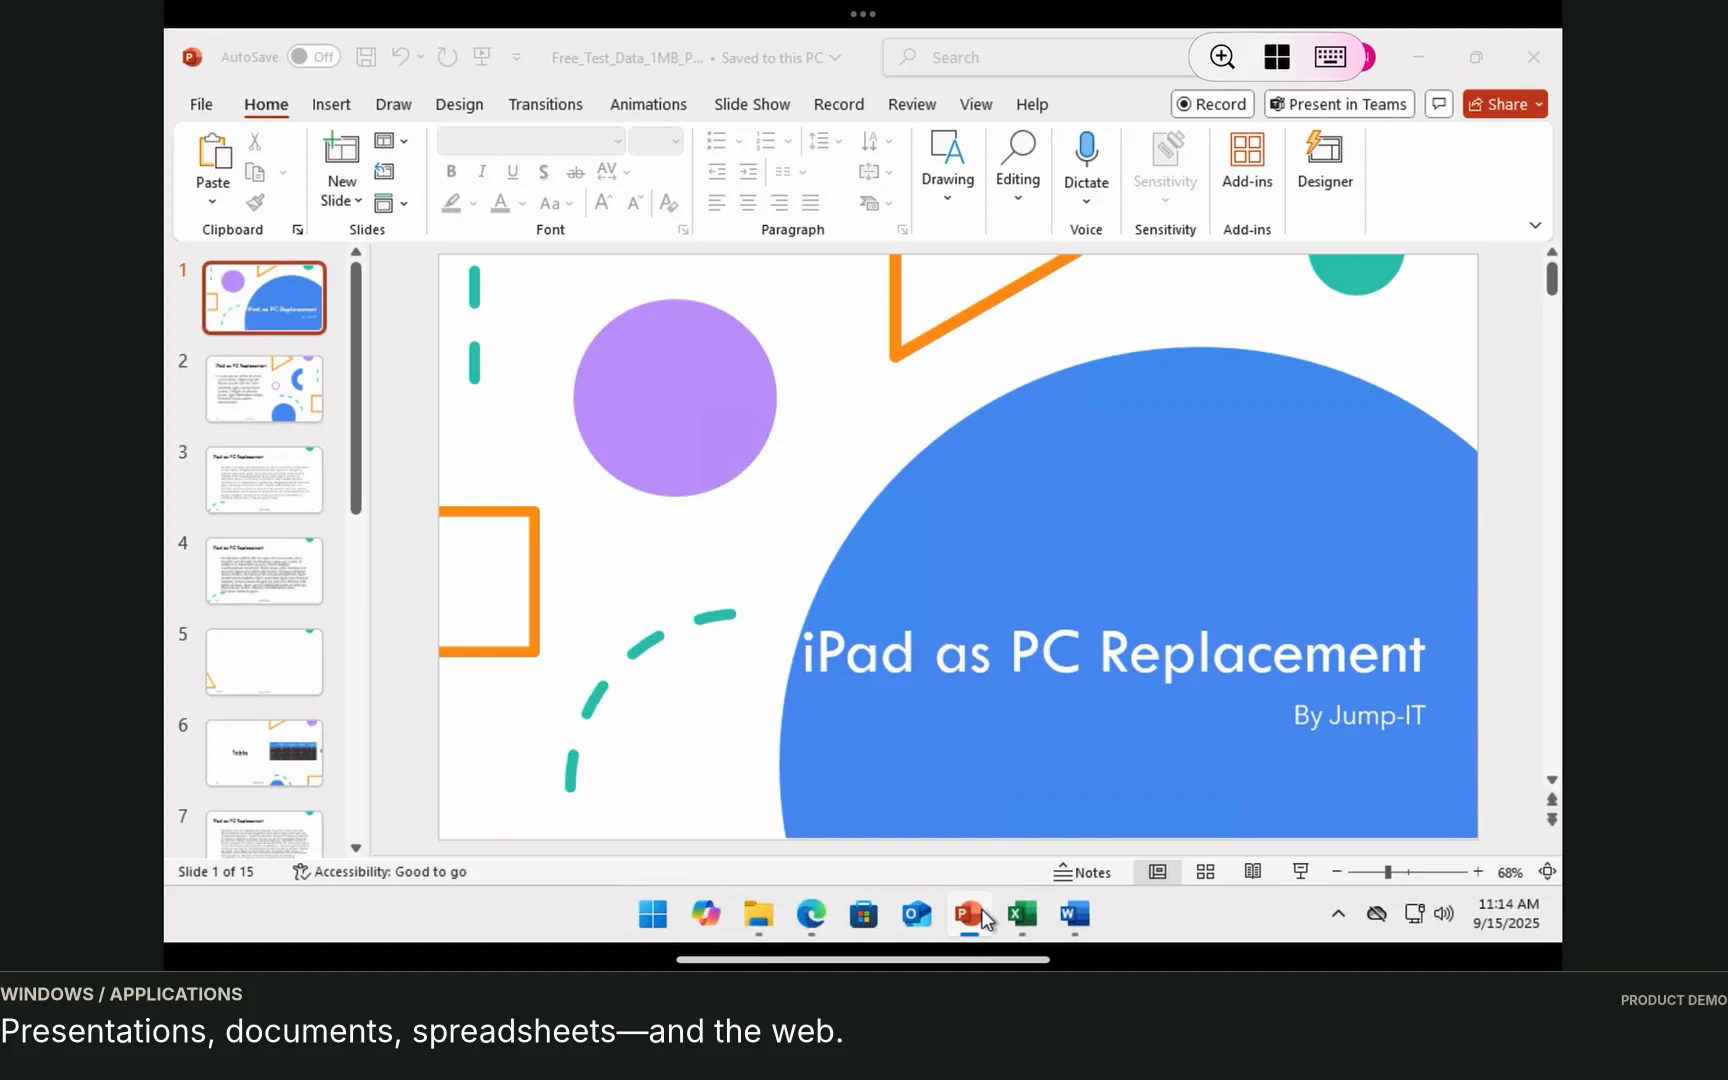
To onboard with Jump-Teams, create the Team, invite the colleague, choose their Team permissions and assign a suitable Jump-Desk. Configure Windows access separately, confirm the funding arrangement and test the connection on the person’s device before their first working session.
From invitation to the first working session.
Write down the role’s needs
List required applications, licences, files, expected uptime and the person’s main working location. Include any specialist devices or restrictions.
Create the Team
Open Active Team and choose Create Team. Give it a recognisable name and confirm the currency before creating it. The creator becomes Owner.
Send the invitation
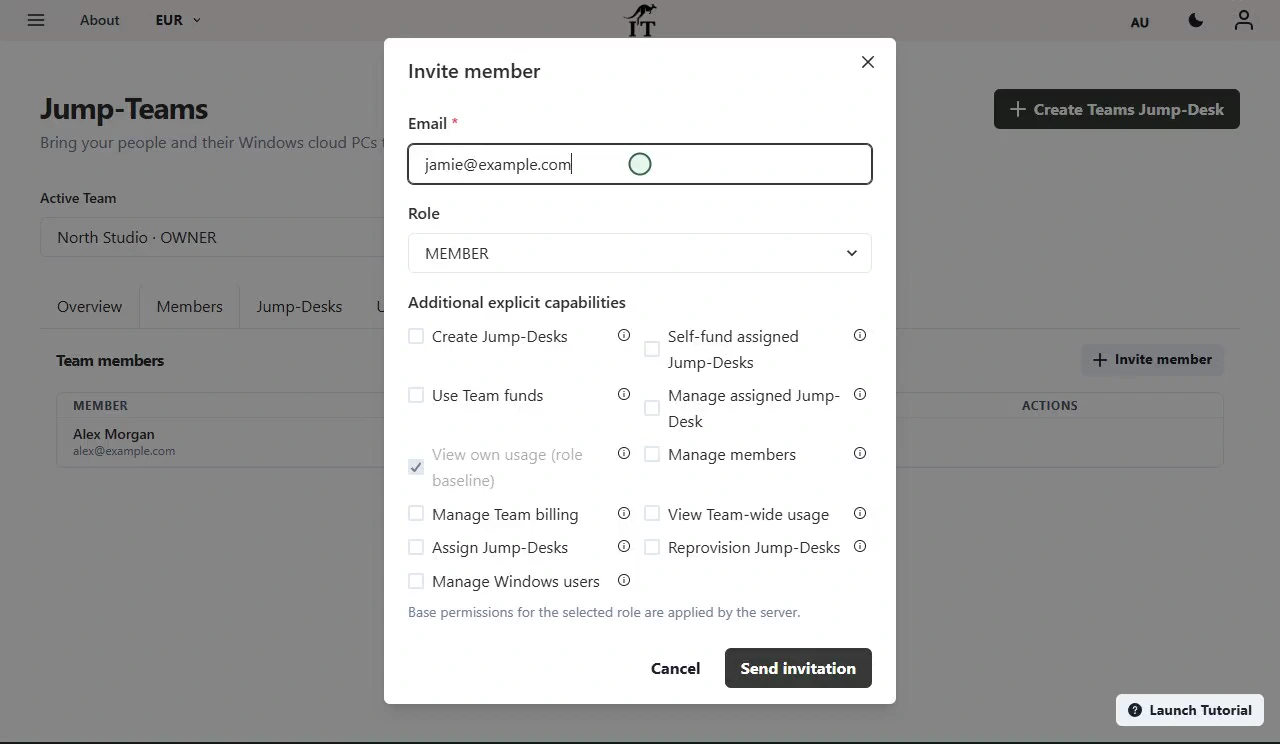
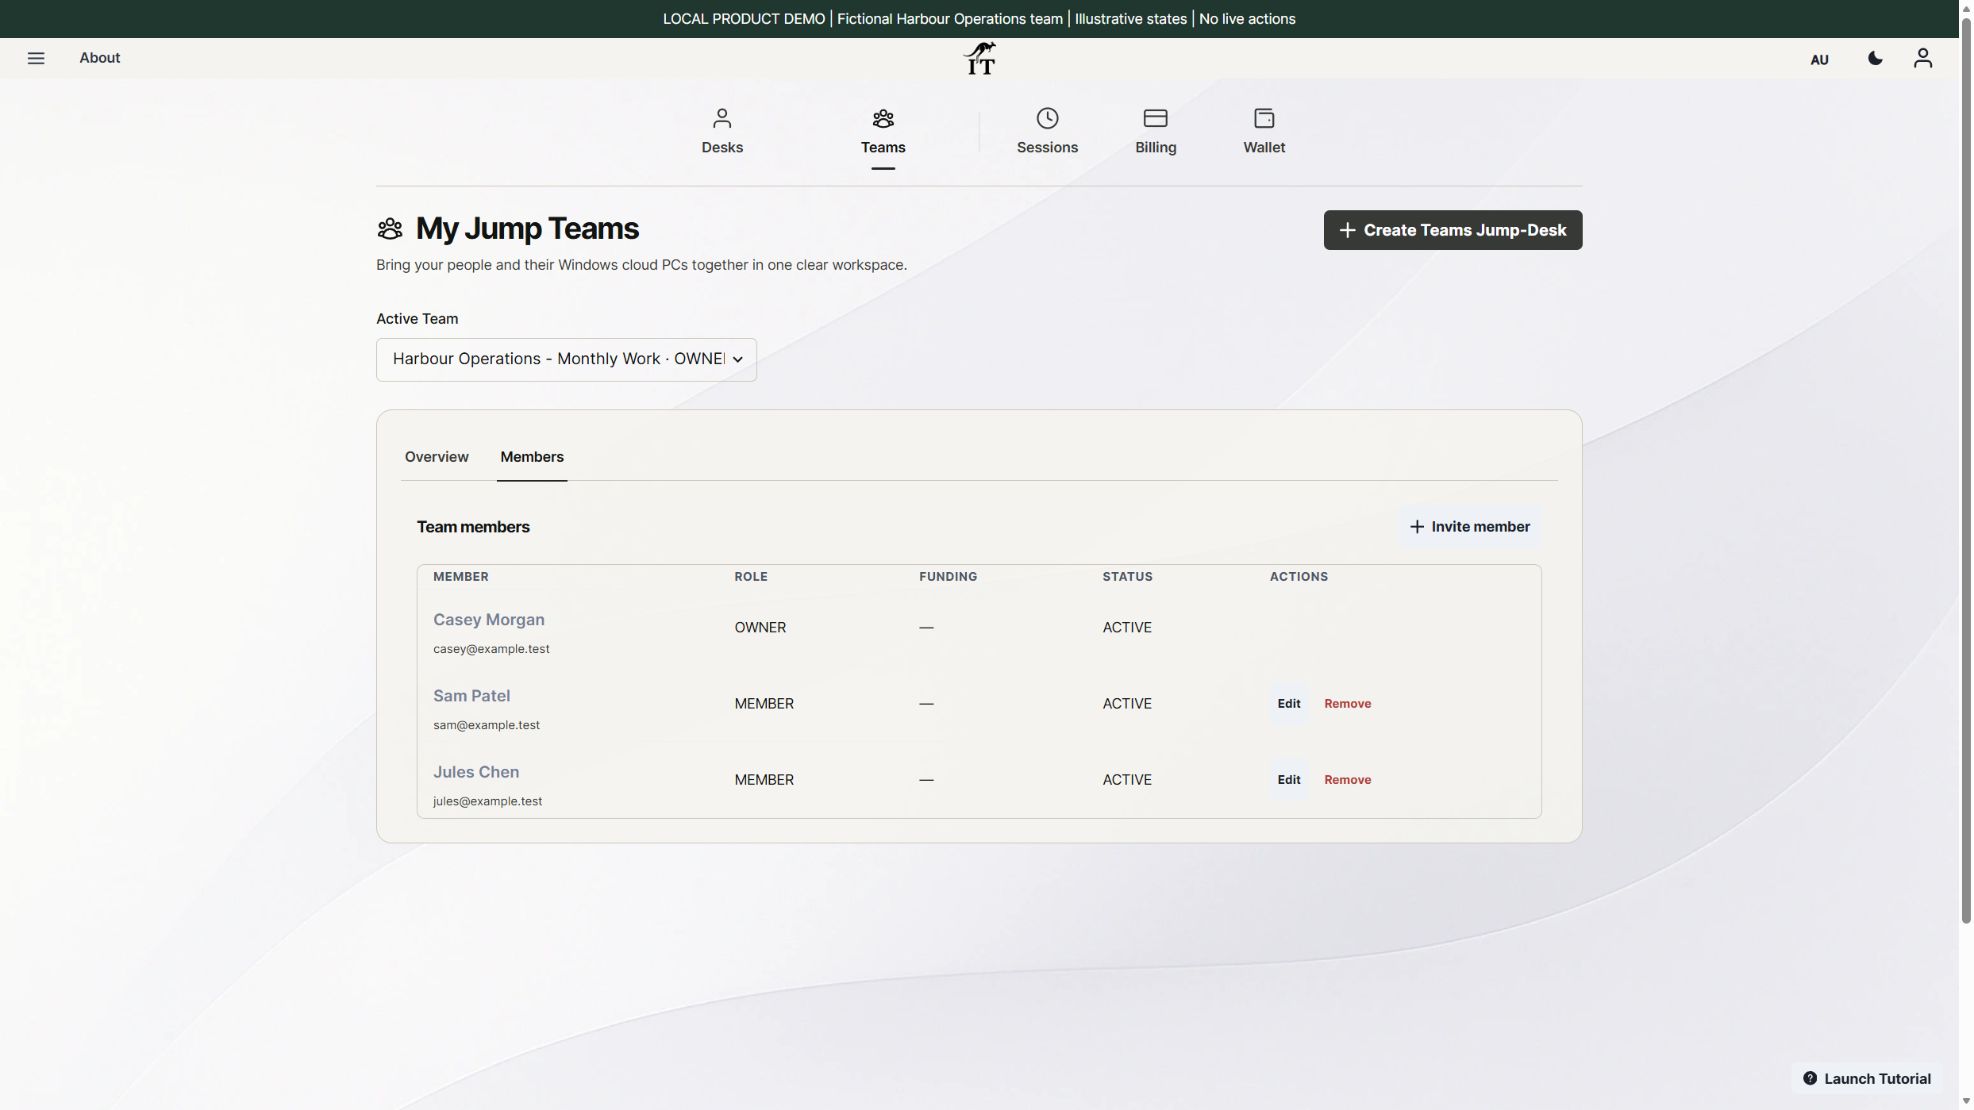
Open Members, choose Invite member and use the email address the colleague will use to join. Select Member or Admin and only the additional permissions needed.
Confirm acceptance
Have the colleague accept the invitation with their own account. Verify the correct Team appears before assigning the operational work.
Choose and assign the desktop
Select a suitable available region, tier and plan. Review the price, uptime and funding requirements. Assign the Jump-Desk to the intended colleague.
Configure Windows access
Set up the separate Windows login and permissions for the desktop. Team membership by itself is not the Windows credential.
Test a real working session
Ask the colleague to connect using a supported client, open the required application and complete a representative task. Confirm file and backup arrangements.
Record the handover
Record who handles administration, funding and support. Set a date to review usage and whether the workspace still fits the role.
YOUR NEXT STEP
Make the first session a useful handover.
Send an invitation, assign the right desktop and confirm that the colleague can connect with their own Windows credentials. Test the actual application and file workflow before calling onboarding complete.
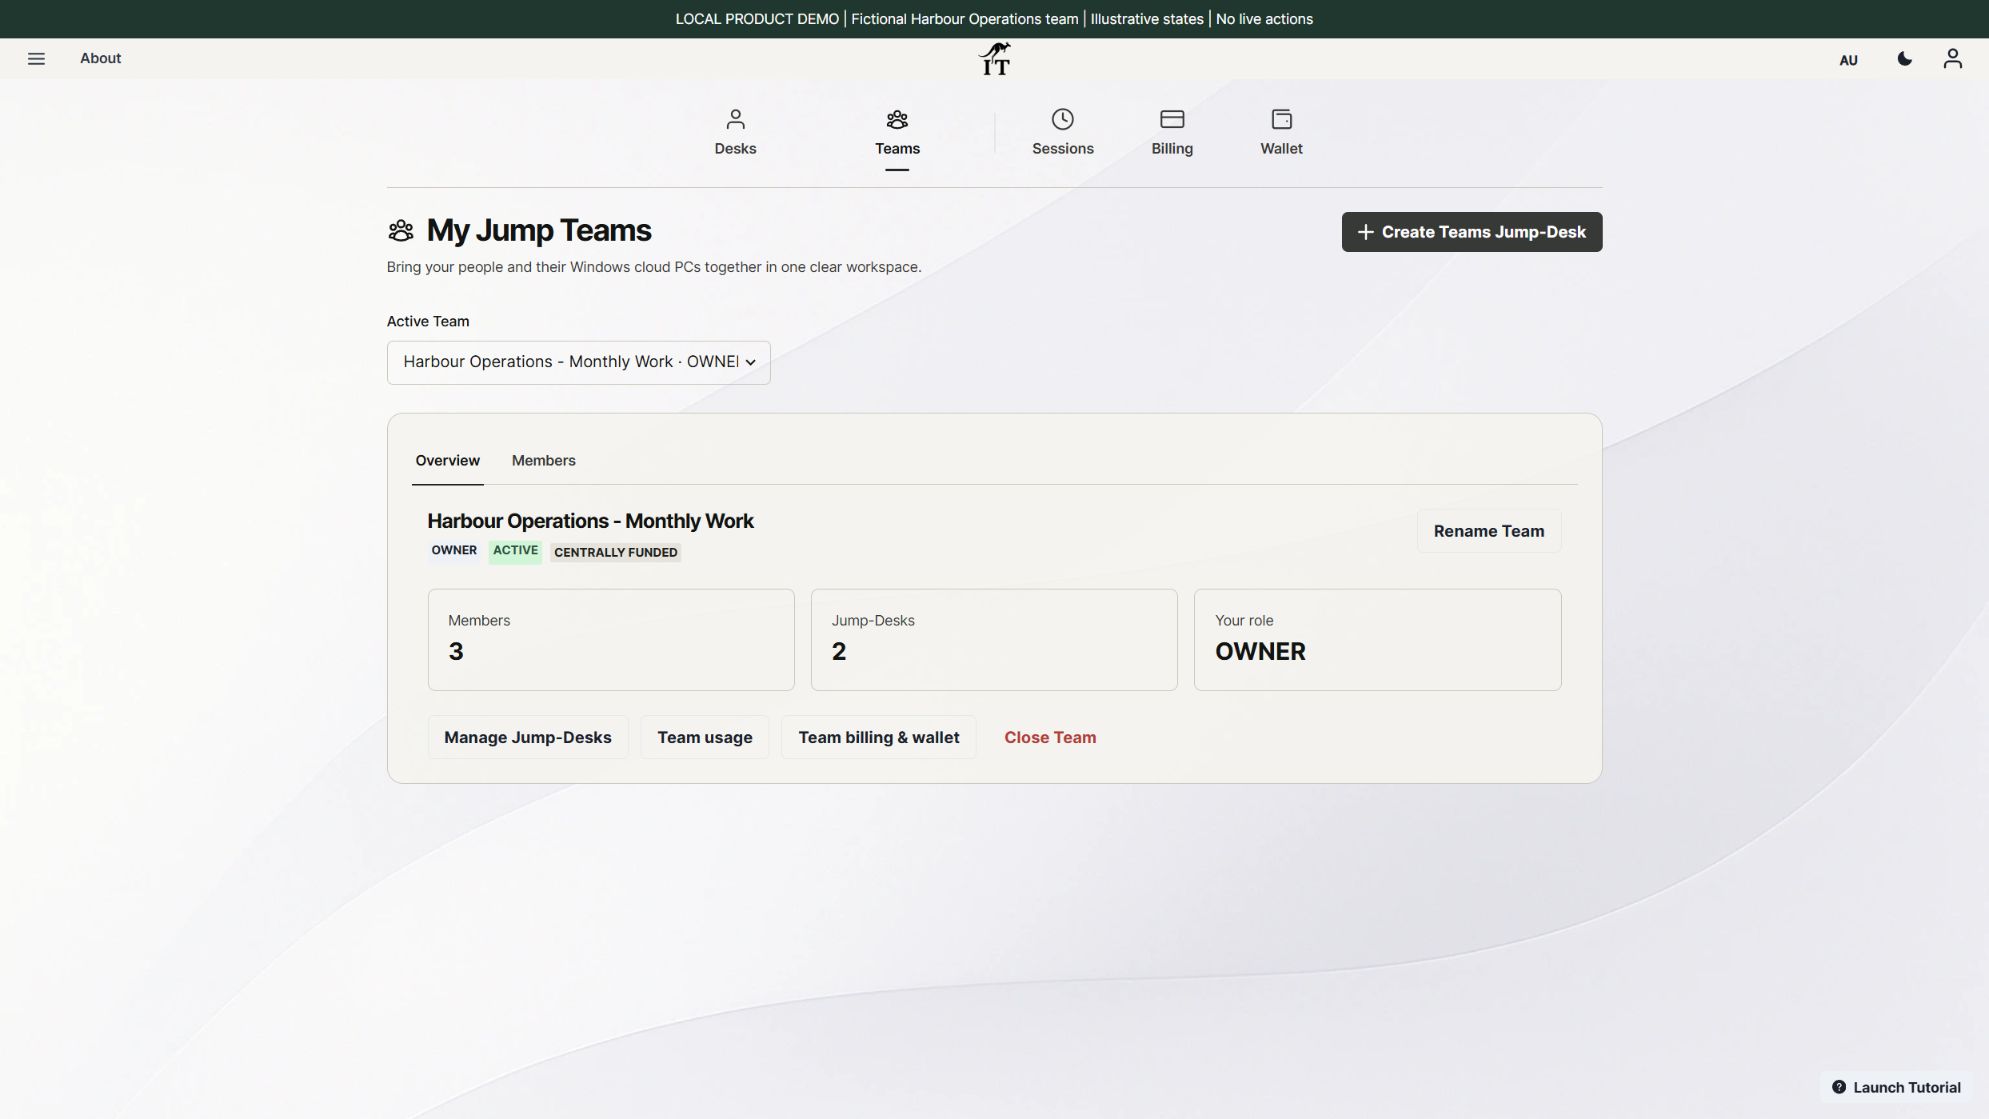
Jump-Teams invitation and member permission controls. Product capture with demonstration data. Select to enlarge.
01 / JUMP-TEAMS
A role is clearer than a blanket permission.
Decide who needs to invite people, manage assignments, review usage or handle payment settings. Give each responsibility to an appropriate person and use the controls available in the product.
A new administrator does not automatically need control of billing. An employee who only needs to do their work should not receive extra management permissions by default.
Jump-Teams invitation dialog with Member and Admin roles and additional permissions. Demonstration data.
02 / JUMP-TEAMS
Give funding its own conversation.
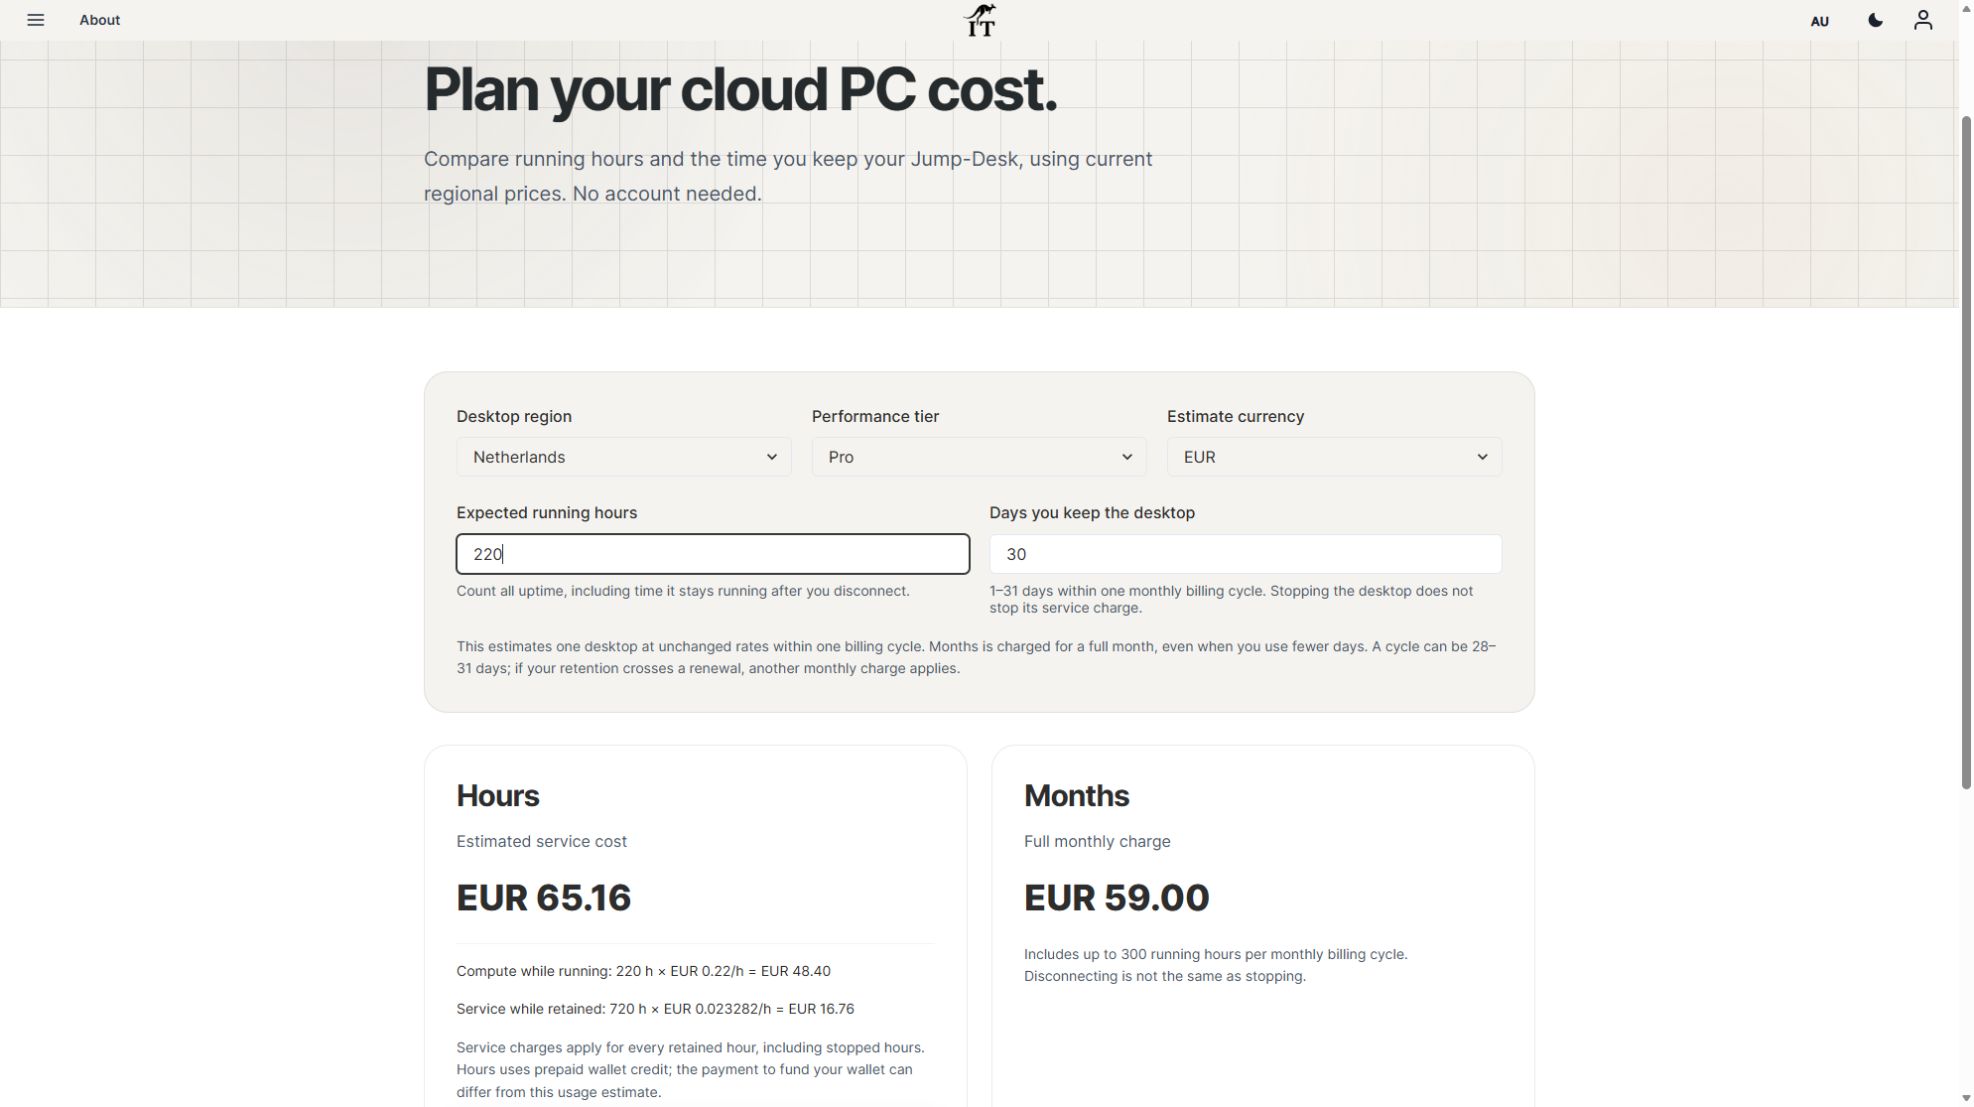
Months uses subscription checkout and includes up to 300 hours of desktop uptime each month. Confirm that allowance matches the role, including time a disconnected desktop may keep running.
For eligible Hours desktops, review central funding and any member self-funding choice. Member funding needs their explicit approval, and personal payment details stay private. Explain that the service charge continues while the Hours desktop is retained.
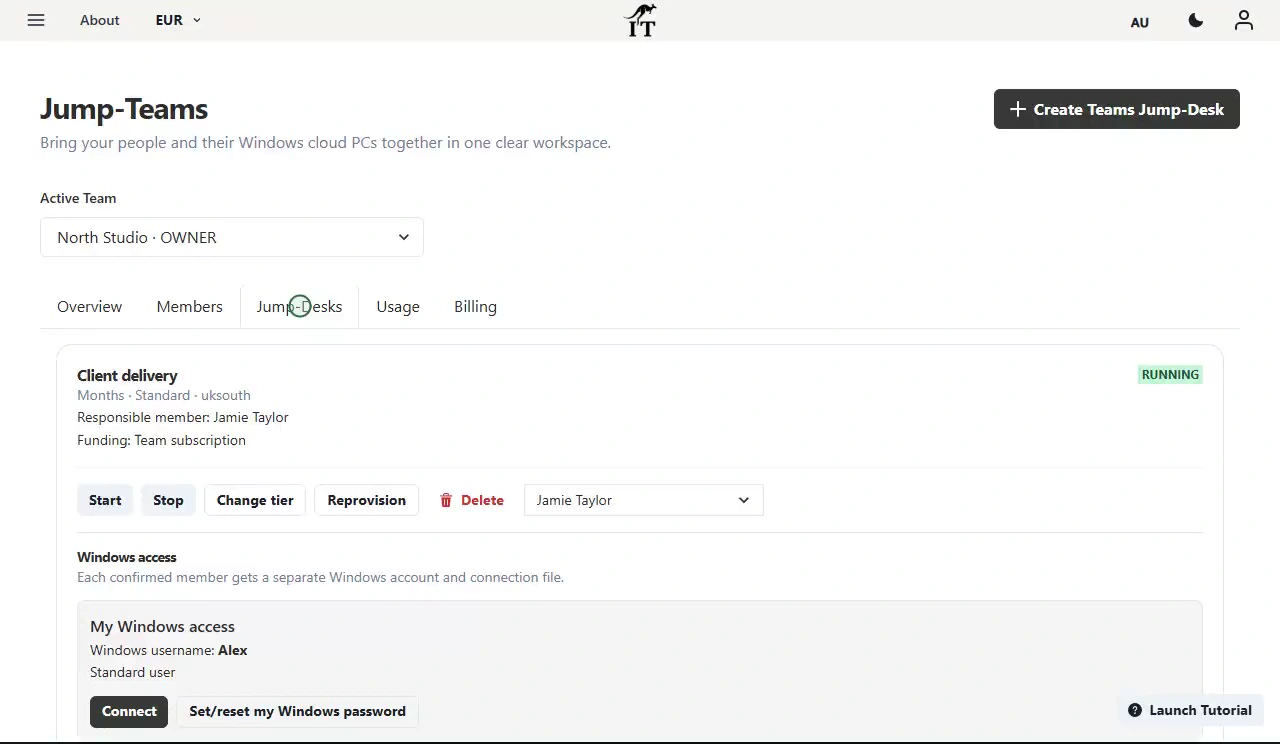
The Jump-Teams Desktops view, showing assigned Windows workspaces and management actions. Demonstration data.
03 / JUMP-TEAMS
Make a remote first day predictable.
Test the colleague’s actual device and network. Check client installation, display scaling, keyboard behaviour and how they will obtain support. Install only appropriately licensed, compatible applications.
Keep a short internal record of the setup. Store credentials through your organisation’s normal secure process, rather than including them in general onboarding notes or sending shared logins around the team.
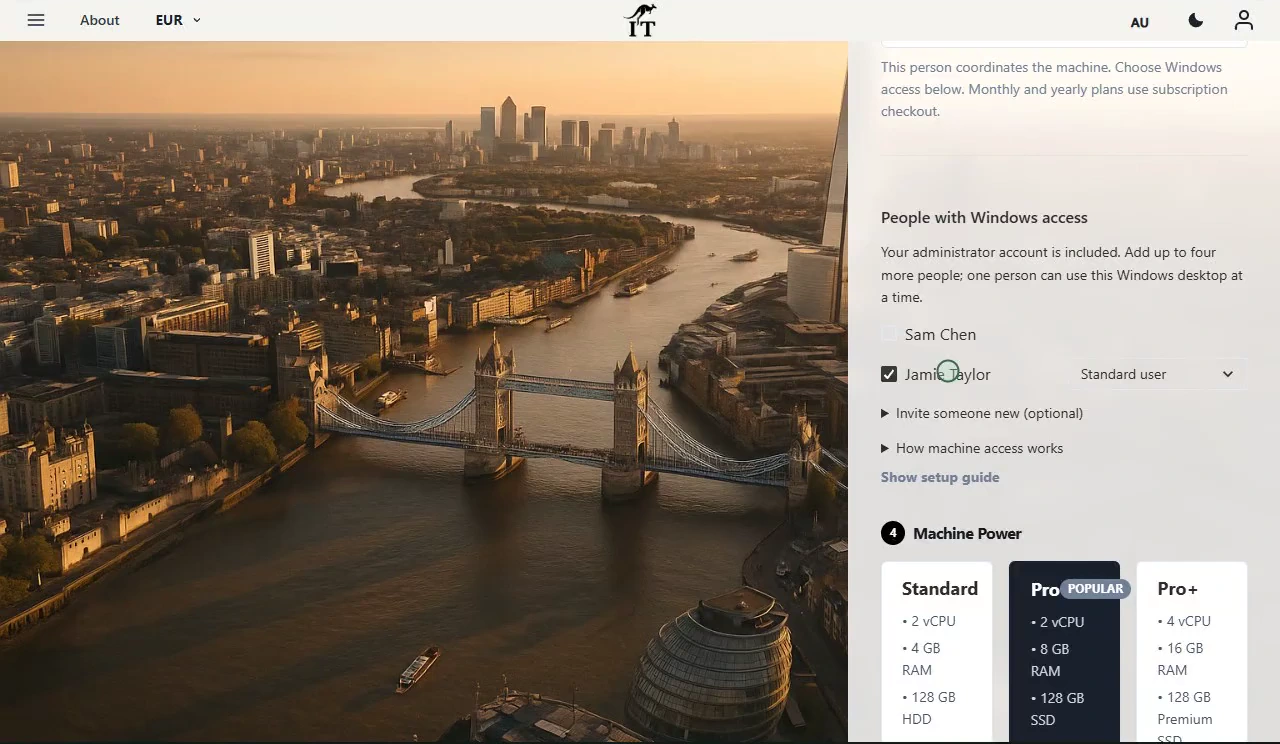
Jump-Teams desktop access settings for a team Windows workspace. Demonstration data.
04 / JUMP-TEAMS
Use the same care when a project ends.
First preserve the business files and results you need. Review application access and the person’s Windows access. Then review Team membership and the desktop’s ongoing funding or subscription.
Removing membership, stopping compute and deleting a desktop are different actions. Do not assume one completes the others. Check the outcome in the product and save required work before destructive desktop actions.
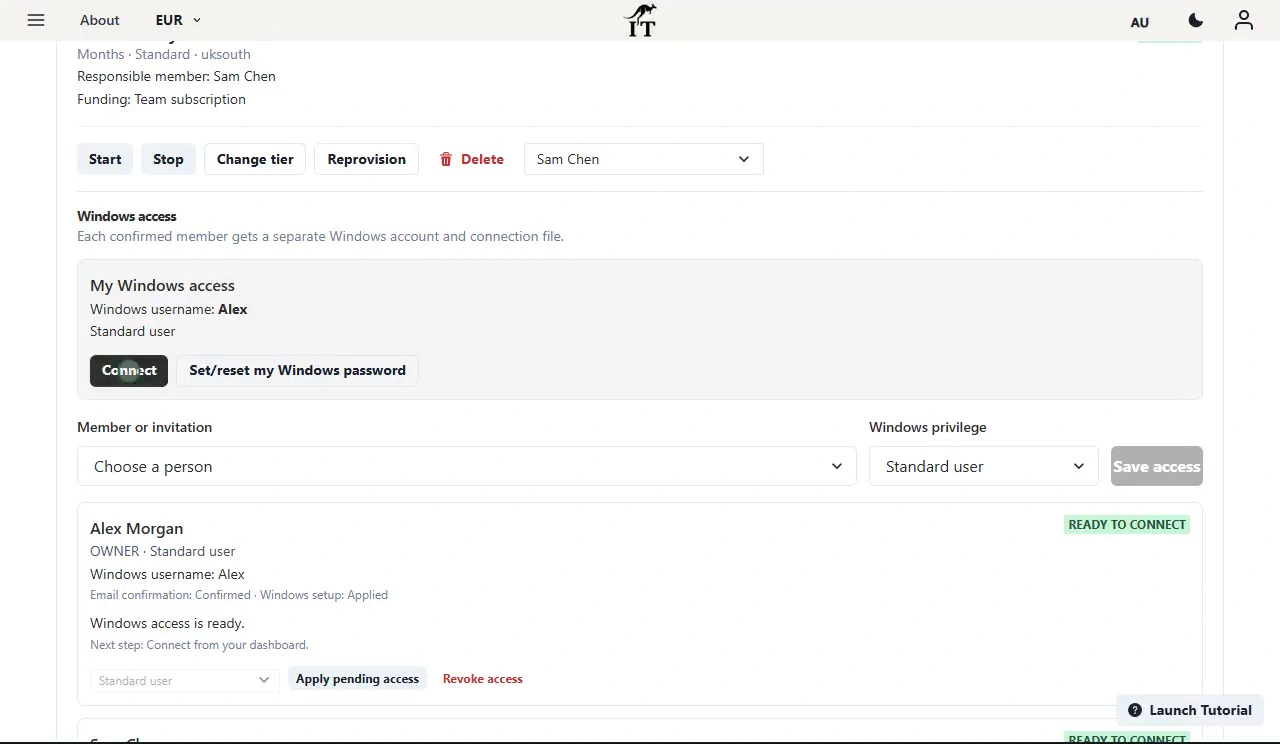
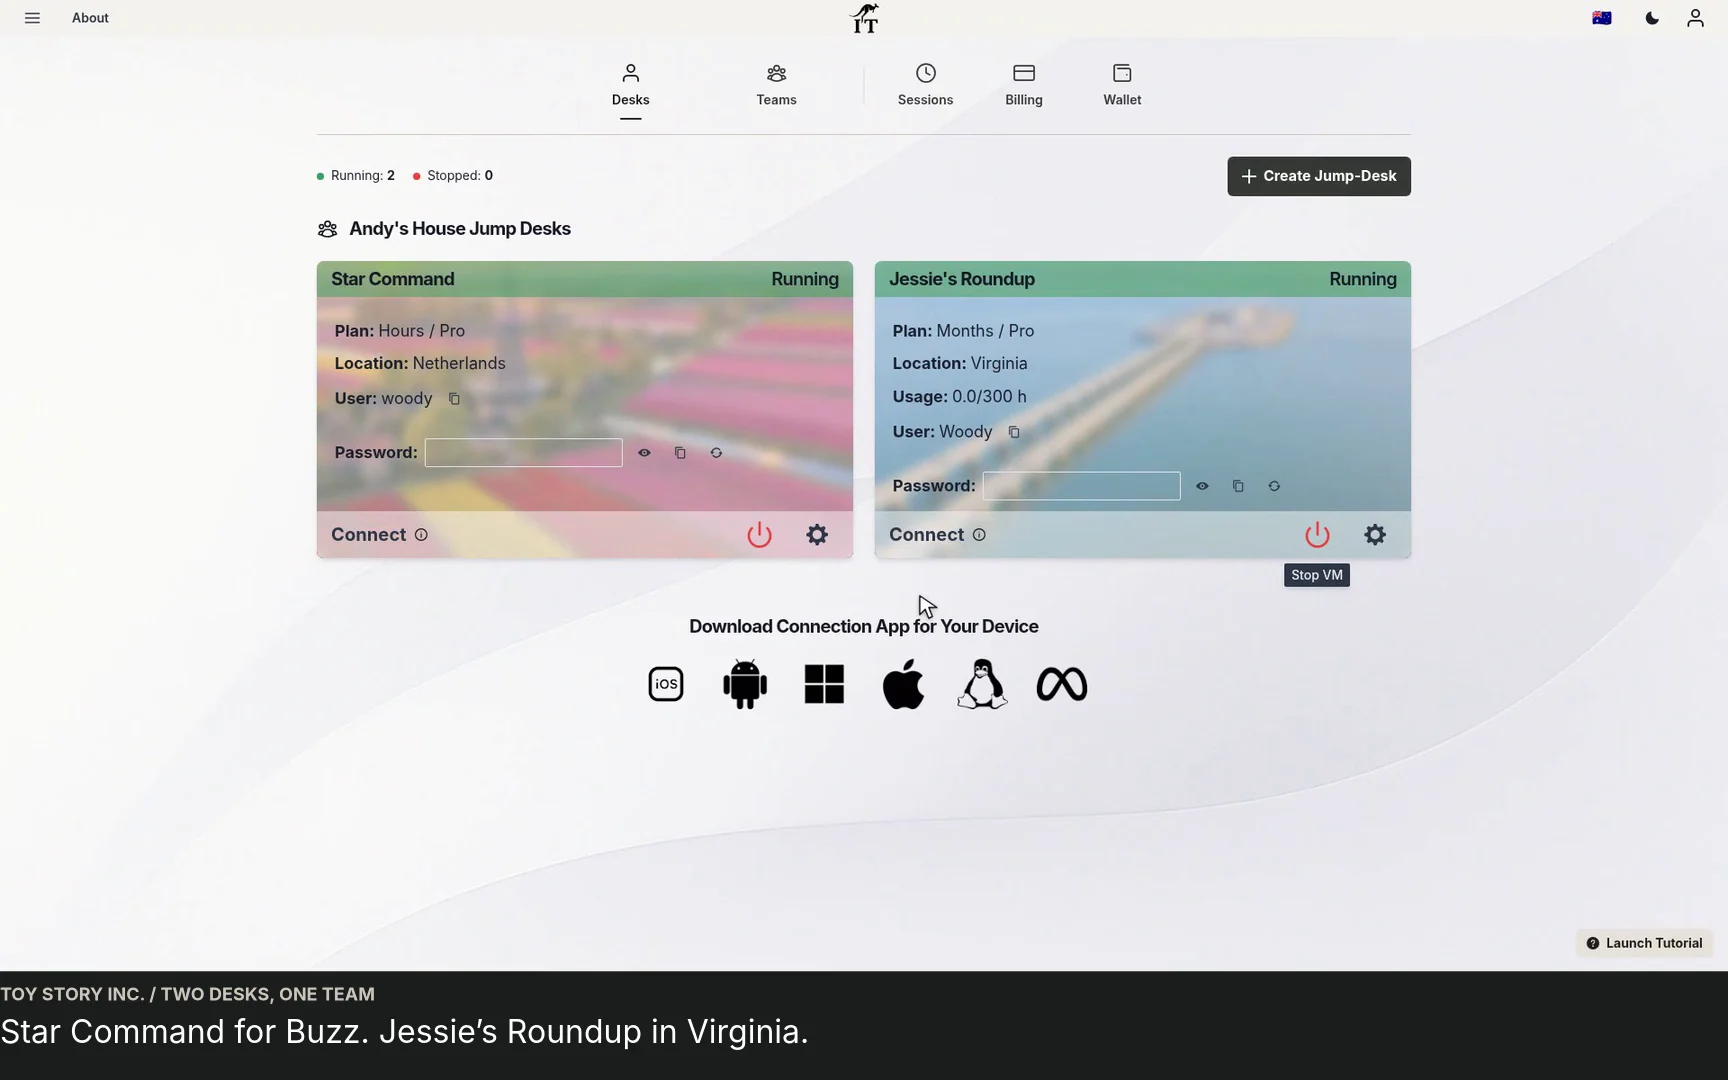
A team member’s connection view in Jump-IT. Demonstration data.
05 / JUMP-TEAMS
Turn the pilot into a repeatable process.
After the first successful setup, reuse the role checklist for the next person. Keep the requirements current as the applications, team and working pattern change.
For a business with more specialised identity, policy or regulatory needs, check those requirements separately. A clear onboarding process is useful even when additional management tools are required.
Illustrative workspace.
INSIDE THE PRODUCT
See a team take shape.
Watch the current interface with demonstration data. Each recording has playback controls, captions and a written walkthrough.
PRODUCT WALKTHROUGH29 seconds
Create a Team and invite people
Create a Team, confirm its currency, and invite a colleague with the appropriate role.
Read the walkthrough
Start your Team Open Active Team and choose Create Team. Team creation must be enabled for your account.
Name the workspace Use a familiar company or project name. Confirm the currency, which is locked when the Team is created.
Create the Team Your new workspace brings people and desktops together. You can add colleagues next.
Open Members Members shows the people in this Team. Choose Invite member to bring someone in.
Choose a role for the work Enter an email and choose Member or Admin. Review extra permissions only where they are needed.
Send the invitation The invitation remains pending until accepted. This sample invitation is simulated; no email is sent.
PRODUCT WALKTHROUGH33 seconds
Set up a Team desktop
Choose a Team, plan and responsible person, then set separate Windows access before checkout.
Read the walkthrough
Create for your Team Start from Create Teams Jump-Desk. Name the machine and choose the administrator username.
Choose the location Pick an available region suited to where the person using this desktop works.
Select a plan This example uses Monthly. Check the price and uptime allowance for the current configuration.
Choose the responsible person Assign responsibility within the Team. Windows access is configured separately below.
Choose who can use Windows Add the person who needs a Windows account. One person can use this desktop at a time.
Review the desktop Choose machine power, check the total and review the terms before checkout. No purchase is made here.
PRODUCT WALKTHROUGH24 seconds
Assign a desktop and connect
Review a Team desktop, change its responsible member, and find the member’s Windows connection.
Read the walkthrough
Open the Team desktops Choose the active Team, then Jump-Desks. Available controls depend on your permissions.
Assign responsibility Choose who coordinates this machine. Assignment and Windows access are separate settings.
Check Windows access Each confirmed member has their own Windows account. Confirm that their access is ready.
Download your own connection Use Connect under My Windows access. The file uses your member account for this desktop.
Continue in your connection app Open the file on your computer, or add the PC in Windows App on iPad with its host details.
A pilot an owner can evaluate.
One role. One real task.
Start with a role the business needs to support. For a contract developer, prepare a Windows desktop with the selected editor, Git, runtime, project repository and test accounts, then rehearse building the application and handing over a code change. For an operations colleague, prepare the licensed business applications and project folders used through the day. Choose capacity and access for that work, and check the actual device and connection.
A budget with the full picture.
Include the desktop plan, retained-desktop service charges on Hours, software subscriptions and the support needed to keep work moving. For prepaid funding, decide who can fund a wallet and review the remaining balance before a busy period. Use the account’s live prices.
An access process that lasts.
Keep the person’s Jump-IT account, Team role and Windows credentials separate. Confirm the member can reach only the controls they need. When a role changes, review Team permissions, Windows access and application accounts together; removing membership alone is not a complete offboarding process.
Choose a desktop for each working pattern.
Months
A subscription for regular work, with up to 300 hours of uptime per desktop each month. Review the allowance and stop desktops when work finishes.
Prepaid Hours
Eligible desktops draw on prepaid funding. Compute is charged while running, plus a separate service charge while retained. Team wallet and eligible member-approved personal funding have separate permissions.
Years
Consider an annual commitment for an ongoing role. Check the live terms, expected software lifespan and likely team changes before choosing.
Desktop management within Jump-Teams. Demonstration data.
Common questions.
What should I prepare before inviting someone?
Confirm their email address, role, required permissions, application needs, expected uptime and funding arrangement.
Can an Admin manage everything?
Available actions depend on the person’s role and additional permissions. Review the controls shown in the product instead of assuming the role name grants every permission.
Does removing a member end the desktop’s billing?
Treat Team membership, Windows access and billing as separate decisions. Review each explicitly during offboarding.
What makes a useful pilot?
A complete rehearsal of the colleague’s role: for example, a developer builds the customer portal, checks it in a Windows browser, commits the change and hands over setup instructions. Prepare the required tools and approved project access, then check reconnecting from the colleague’s normal device and network.
Make the next working day easier.
Start with a representative role, choose the right desktop and give each person a clear way to begin.
Our touchscreen MacBook Pro and Surface Laptop Ultra guides compare current hardware without requiring every colleague to buy the lead’s device. Choose separate Windows desktops for simultaneous work, test each worker’s connection and check regional requirements. Team management, Windows privileges, application permissions and funding remain separate decisions.
Plan a contractor’s Windows workspace from setup to handover: Team roles, Windows privileges, project files, application access and monthly cost review.
Watch a first-member onboarding demo: create a Jump-Team, choose permissions, send an invitation and hand over a Windows cloud PC with individual access.
Watch a Team member accept an invitation, find their Jump-Desk, review connection settings and open Windows with their own account and connection file.
Built by a startup, for startups. Give your team Windows cloud PCs on supported devices you already own, with invitations, access controls and flexible funding.