Jump‑Desk for Developers: A Windows 11 Cloud Development PC
Create a personal Windows 11 Pro Jump‑Desk with administrator access. Choose from 20 Azure regions, three performance tiers and Hours, Months or Years—then connect from iPad, Mac, Android, Linux or Windows.
Last reviewed: 8 September 2026By Jump‑IT TeamDeveloper use case
What does Jump‑Desk give a developer?
Jump‑Desk is Jump‑IT’s personal Windows 11 Pro cloud desktop: choose a region, billing plan and performance tier, let Jump‑IT create the Windows machine, then manage it from one dashboard and connect through a personalised RDP file.
Each Jump‑Desk gives you administrator access to install compatible Windows development software. Your IDEs, SDKs, repositories, settings and files remain on the desktop while the Jump‑Desk exists. The dashboard shows its status, credentials and connection controls, and can reset the administrator password while the machine is running.
This makes Jump‑Desk especially attractive when you need a Windows-only toolchain, a separate client environment, a temporary PC for a project, or Windows access from an iPad, Mac or Linux device. It is not a public server or universal workstation: internet access is required, every current tier has a 128 GB drive, no dedicated GPU is listed, and specialist virtualisation or networking requirements must be confirmed first.
Windows 11 Pro + adminInstall compatible Windows development tools on your own persistent cloud desktop.
20 Azure regionsChoose among the configured locations shown in the Jump‑Desk creation flow.
Three performance tiersStandard, Pro and Pro+ provide progressively more memory and storage performance.
Hours, Months or YearsMatch the commitment to a short test, recurring project or longer-lived workspace.
A developer PC created and controlled through Jump‑IT
Why developers choose a Jump‑Desk
Jump‑Desk removes much of the setup between “I need a Windows PC” and “I can start working”: choose the configuration, create it, connect and keep the workspace for the next session.
Create Windows without building a VPS
Select a Jump‑Desk region, billing plan and tier in the Jump‑IT creation flow. Jump‑IT provisions the Windows 11 Pro desktop and presents its controls in the dashboard; you do not begin with a blank server and configure the desktop stack yourself.
Install once and return to the same desktop
Administrator access lets you install compatible IDEs, SDKs and utilities. Stopping the Jump‑Desk is not deletion, so installed tools, repositories, settings and files remain while the Jump‑Desk exists.
Separate client and test environments
Create multiple independently billed Jump‑Desks under one login when projects should not share the same desktop. The dashboard lists the machines separately and Usage groups their billing independently.
Connect from the device already in your bag
Download the personalised RDP file from Jump‑IT and open it in a compatible client on iPad, Mac, Android, Linux or Windows. The code and applications run on the Jump‑Desk; the local device displays and controls them.
Match the plan to the project
Choose Hours for intermittent use, Months for a recurring workspace with 300 hours of monthly uptime, or Years for the published unlimited usage and uptime arrangement.
See status, sessions and billing in one place
The dashboard shows whether each Jump‑Desk is running, unlocks Connect while it is running and can reset its password. Usage shows session history, while invoices are available through the billing area.
CreateChoose region, billing plan and tier
StartWait for the dashboard status to show Running
ConnectDownload and open the personalised RDP file
StopStop from the dashboard when the session ends
Closing the remote desktop client only disconnects the session. It does not stop an Hours Jump‑Desk.
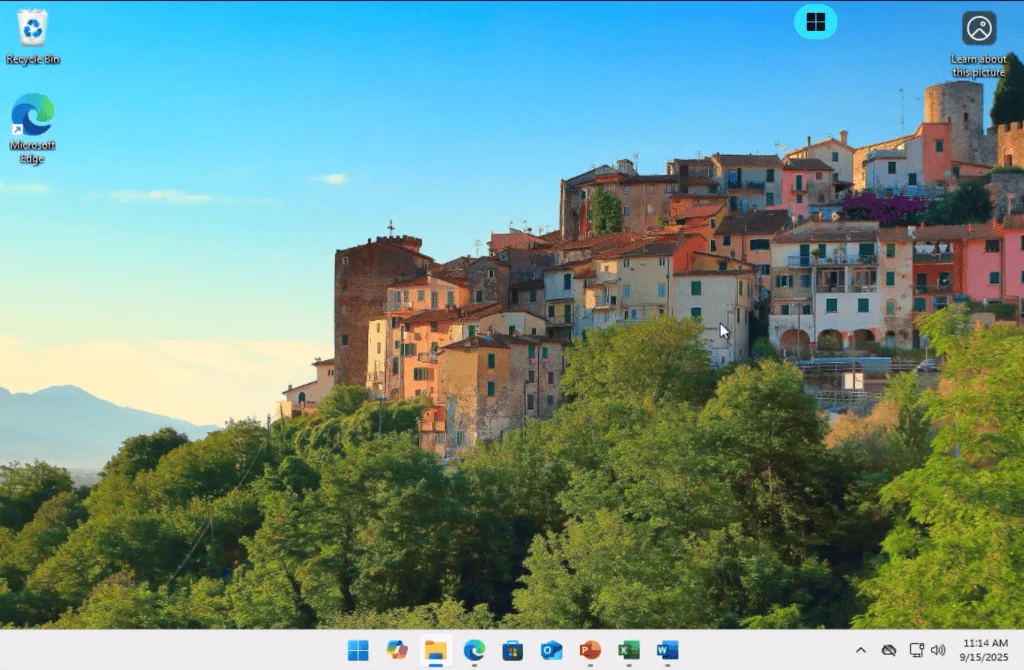
Illustrative workspace.
YOUR NEXT STEP
Size the workspace around a real build.
Test your editor, dependencies and a representative build before choosing a tier. Keep source in version control and check specialist hardware or virtualisation requirements separately.
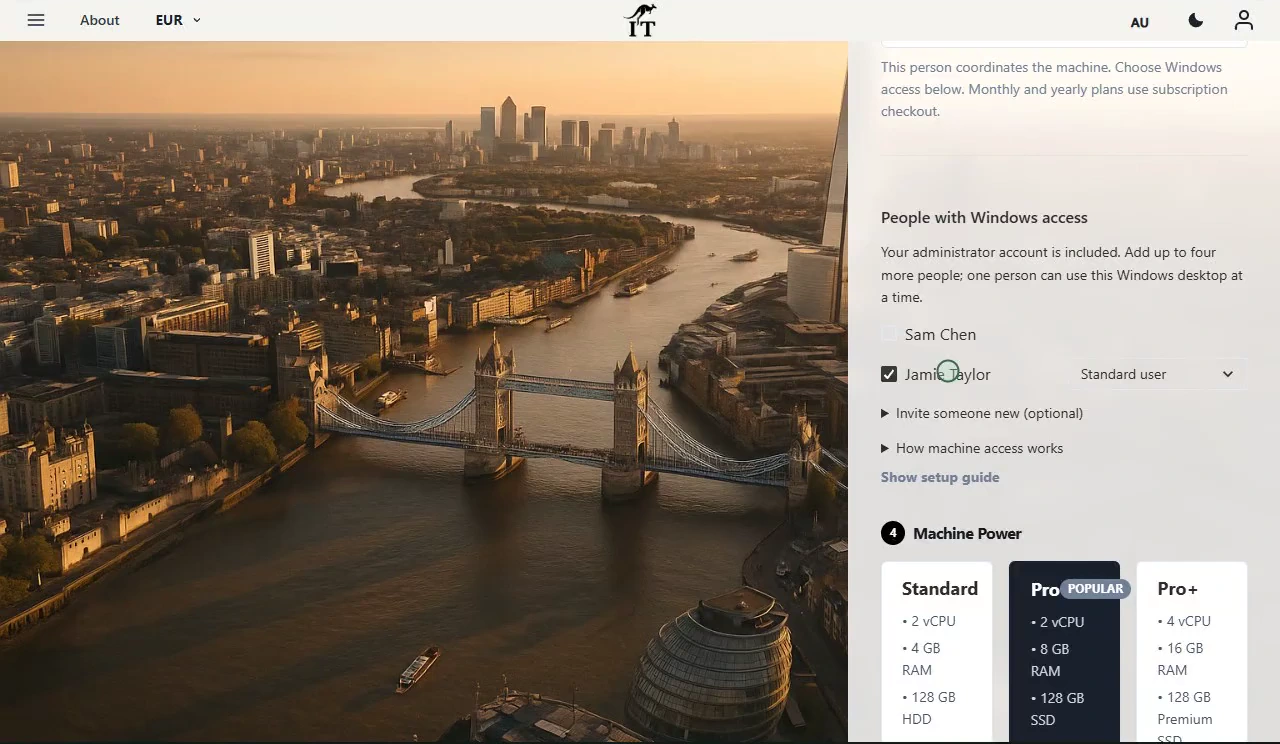
Windows access choices and Standard, Pro and Pro+ performance tiers. Product capture with demonstration data. Select to enlarge.
Your Jump‑Desk does the Windows work
Turn an iPad, Mac or Linux device into your Jump‑Desk terminal
The local device does not install or emulate Windows. It sends keyboard, pointer and touch input to your Jump‑Desk and receives the remote display. Your Windows editor, compiler, browser and project files remain together on the cloud desktop.
For sustained coding, use a physical keyboard and mouse or trackpad. Jump‑IT provides device-specific client links in the dashboard, including Microsoft remote desktop clients and Remmina guidance for Linux, followed by the personalised RDP connection file.
Windows and the development tools run remotely while the iPad provides the display and controls.
Install compatible tools on your own Jump‑Desk
What developers can do on a Jump‑Desk
A Jump‑Desk behaves like a personal Windows 11 Pro desktop, but the current CPU, RAM, storage, networking and acceptable-use limits still determine whether a specific toolchain fits.
Editors and IDEs
Install a compatible Windows editor or IDE with your own licence, then keep its extensions, settings and project folders on the persistent Jump‑Desk.
Language runtimes and SDKs
Install Windows-compatible .NET, Java, Python, Node.js or other toolchains that fit the selected Jump‑Desk tier and the current 128 GB drive.
Git and source control clients
Clone, edit, commit and push from inside the Jump‑Desk. Keep repository credentials protected and treat the remote repository—not the VM disk—as the authoritative copy.
Windows and browser testing
Use the Jump‑Desk as a separate Windows 11 environment for Windows-specific behaviour, desktop-browser checks and client application testing.
PowerShell and command-line work
Use PowerShell and permitted Windows command-line tools interactively. Jump‑Desk is not an unrestricted runner for continuous automation, mining or stress workloads.
Local development services
Run compatible local development services for your own session, subject to the blocked-port policy. A Jump‑Desk is a personal desktop, not public hosting for a website, API or database.
Visual Studio
VS Code
Git
PowerShell
.NET
Java
Python
Node.js
Windows browsers
These are examples, not bundled software or compatibility guarantees. Check the current requirements and licences for the exact versions you intend to use.
From the developer’s perspective, the loop is familiar: connect to the Jump‑Desk, install the toolchain, retrieve the project, build and test, then commit and push before ending the session.
The important difference is operational: the Windows computer is remote. Network quality affects interaction, and stopping the machine must be done through the Jump‑IT dashboard—not by merely closing the remote desktop window.
The same location and tier system as the Jump‑IT app
Developer Jump‑Desk Locations, Plans and Pricing
Choose the available Jump‑Desk region nearest to you, then compare the Windows development capacity in Standard, Pro and Pro+. Selecting a location changes the destination image and loads that region’s current pricing from Jump‑IT.
Choose a region near your regular workplace, then check the available plans.
Every tier can be created with Hours, Months or Years. Choose the tier for the software requirements first, then choose the billing plan for how often the development workspace will run.
WINDOWS CLOUD PC
Standard
For lighter editors, command-line work and narrowly scoped Windows testing.
Current regional prices load from Jump-IT. Review the final price and availability in the product before purchase.
Hours uses prepaid funding. Compute is charged while running; the separate service charge continues while the desktop is retained. Months includes up to 300 hours of uptime per month. Check taxes, included usage and the complete terms in Jump-IT.
Developer recommendation: compare your IDE, SDK, browser and local-service requirements with the tier specifications. Pro is a sensible starting point for many workflows; choose Pro+ when the compatible workload genuinely benefits from 4 vCPU and 16 GB RAM.
HoursRunning usage is charged while the Jump‑Desk is started. A separate per-hour service fee covers the retained storage and public IP while it exists.
MonthsIncludes 300 hours of uptime per month and the configured automatic shutdown after three hours of idle time.
YearsThe current tier configuration describes unlimited usage and uptime for a longer-lived development workspace.
Live prices vary by Azure region and use the currency selected above. Taxes, currency conversion, service charges and checkout conditions may apply; the final configuration and total shown by Jump‑IT at checkout take precedence.Select a location and currency above for current prices.
In Jump‑IT, choose the region, Hours/Months/Years plan and Standard/Pro/Pro+ tier before creating the developer Jump‑Desk.
Choose Jump‑Desk for the right development job
When Jump‑Desk is—and is not—the right developer environment
Jump‑Desk is a good fit when…
You need a Windows-only IDE, SDK, browser or desktop tool from a non-Windows device.
You want a persistent second workspace for a project or client requirement.
You need Windows for a temporary contract, course, lab or compatibility test.
Your tools fit within 2–4 vCPU, 4–16 GB RAM and the current 128 GB drive.
You work from places with a stable connection that permits outbound TCP 3389.
You are comfortable keeping source in a remote repository and backing up important data.
Choose another solution when…
You must work offline or on unreliable networks.
Your build or AI workload requires a dedicated GPU.
You need confirmed Docker, WSL 2, Hyper-V or nested-virtualisation support.
You need more than the current 128 GB drive without arranging an alternative.
You want to expose a public website, API, database or unrestricted inbound service.
You intend to run continuous automation, stress tests, mining, peer-to-peer or other prohibited workloads.
Personal desktop, server or managed fleet?
Jump‑Desk compared with a VPS and traditional VDI
Jump‑Desk is deliberately positioned between buying another developer laptop and operating infrastructure: it is a personal Windows cloud desktop, not a public server and not an enterprise VDI control plane.
Personal cloud workstation
Jump‑Desk
Best when one developer wants Jump‑IT to create and manage access to a persistent Windows 11 Pro desktop, with region, plan, tier, status, connection and billing presented through the product workflow.
Server infrastructure
VPS
Better when the goal is server infrastructure: public services, server-level networking and direct operating-system administration that you will configure, secure and maintain yourself.
Organisation-managed desktops
Traditional VDI
Better for central IT teams that need centrally governed identities, policies, application delivery and lifecycle control across a larger managed workforce.
Public-domain programming image by Lorenzo Cafaro, released under CC0 1.0 and available through Wikimedia Commons.
The exact Jump‑IT journey
How a developer creates, connects to and stops a Jump‑Desk
Confirm the toolchain fits
Check the IDE, SDKs, runtimes, storage, GPU, virtualisation and port requirements against the current Jump‑Desk specifications and limitations on this page.
Create the Jump‑Desk
Open Create Jump‑Desk and choose an available region, Hours/Months/Years billing and Standard/Pro/Pro+ performance tier. Review the live total before checkout.
Start it and wait for Running
After creation, use the dashboard power control to start the Jump‑Desk. When its status shows Running, the Connect control becomes available.
Select Connect and open the RDP file
Select Connect to download the personalised .rdp file, open it in the compatible client for your device and sign in with the credentials shown on the Jump‑Desk card.
Install, code, test and commit
Use administrator access to install licensed compatible tools. Work inside Windows, commit and push valuable changes, and keep a separate backup of anything irreplaceable.
Stop it from the dashboard
Finish writes and builds, close applications, disconnect the client and then stop the Jump‑Desk through Jump‑IT. Closing the remote desktop window alone does not stop an Hours machine.
Developer best practices for a remote Windows workspace
Keep source in version control
Treat the Jump‑Desk as a working copy, not the only copy. Commit and push frequently, especially before major changes, plan transitions or deletion.
Protect secrets and credentials
Do not commit tokens, passwords or keys. Use the appropriate secret-management method for the toolchain and protect the Jump‑IT and repository accounts.
Keep licences compliant
Windows 11 Pro is included as stated. You remain responsible for licences and subscriptions for IDEs, SDKs, databases and other third-party tools.
Stop and review usage
For Hours, disconnecting is not stopping. Stop the Jump‑Desk in the dashboard and review session history and usage so costs remain visible.
Current configured Jump‑Desk regions
EuropeNetherlands, Dublin, Paris, Frankfurt, London, Warsaw and Stockholm
North AmericaVirginia, Washington, Iowa and Toronto
South AmericaSão Paulo
Africa and Middle EastJohannesburg and Dubai
Asia-PacificPune, Singapore, Hong Kong, Tokyo, Seoul and Sydney
Current capacity can vary. Start with the nearest suitable available region, then consider your own network route and the locations of the repositories or services you use.
Technical limits developers should know
Do not choose Jump‑Desk on an assumption
The following constraints are important enough to check before moving a development workflow.
Internet is mandatory: there is no offline Jump‑Desk session.
Outbound TCP 3389: the local network must allow the remote desktop connection.
Inbound services are restricted: the current network policy blocks ports including 80, 8080 and 8443, so this is not public web hosting.
No listed dedicated GPU: do not assume suitability for CUDA, local AI training, 3D rendering or GPU-dependent builds.
Virtualisation is unconfirmed: Docker, WSL 2, Hyper-V and nested virtualisation must be verified for the exact configuration.
Current storage is 128 GB: large SDK sets, caches, virtual disks and repositories can consume that quickly.
High-risk and abusive workloads are prohibited: mining, peer-to-peer services, unauthorised security testing and resource-intensive continuous tasks are not permitted.
Deletion is permanent: export source and data before deleting a Jump‑Desk.
Yes, when the tools fit Windows 11 and the selected CPU, memory, storage and network limits. Jump‑IT creates the Jump‑Desk, gives you administrator access, shows its status and credentials in the dashboard, and provides the personalised RDP file used to connect from a supported client device.
Can I install Visual Studio, Visual Studio Code, Git or language SDKs?
You have administrator access and can install Windows 11-compatible development applications. Check each tool’s current system requirements, storage needs and licence terms before selecting a tier. Jump‑IT does not include third-party software licences.
Can I run Docker, WSL 2 or Hyper-V on a Jump‑Desk?
These tools can depend on hardware virtualisation, nested virtualisation or Windows features that are not advertised in the current Jump‑Desk specifications. Do not assume they are supported; ask Jump‑IT Support to confirm your exact requirement before purchasing.
Can I host a public website or API on a Jump‑Desk?
Jump‑Desk is designed as a personal Windows desktop, not as a public web server or VPS. Its locked-down network policy blocks several inbound service ports, including 80, 8080 and 8443. Use an appropriate hosting platform or VPS for public production services.
Do my repositories and installed tools remain after I stop the Jump‑Desk?
Yes. The Windows desktop, installed tools, settings and files remain while the Jump‑Desk exists. Stopping is not deletion. Important source code should still be committed to a remote repository and backed up separately.
Which Jump‑Desk tier should a developer choose?
Standard can suit lightweight editing and command-line work. Pro adds 8 GB RAM and SSD storage and is the practical starting point for many IDE-and-browser workflows. Pro+ provides 4 vCPU and 16 GB RAM for more demanding CPU and memory workloads. Always check your toolchain’s requirements.
Can I use more than one Jump‑Desk for separate projects?
Yes. The current Jump‑IT workflow supports multiple Jump‑Desks under one login, with each deployment managed and billed independently. This can help separate projects or test environments, but it is not an automated cloning or ephemeral-environment service.
How do Hours, Months and Years work for developers?
Hours charges running usage while the Jump‑Desk is started, plus a separate per-hour service fee for retained storage and the public IP while it exists. Months includes 300 hours of uptime per month and automatic shutdown after three idle hours. The current Years configuration lists unlimited usage and uptime. Regional prices and the final total are shown in the live Jump‑IT creation flow.
Does disconnecting stop an Hours Jump‑Desk?
No. Closing the remote desktop client only disconnects the session. Stop the Jump‑Desk from the dashboard when finished. Running compute usage ends when it is stopped, while the Hours service cost can continue for retained resources while the Jump‑Desk exists.
How this developer use case was prepared
The Jump‑IT Team reviewed the current Jump‑Desk creation flow, regional pricing, tier configuration, regional map, dashboard connection options, network restrictions, account support content and service terms in Jump‑IT on 16 July 2026. Unsupported GPU claims were excluded because the current Standard, Pro and Pro+ specifications do not list dedicated graphics.
Microsoft describes Windows App as software for connecting remotely to Windows devices and applications across supported platforms. Exact client features vary by platform. Read Microsoft’s Windows App overview.
Technical compatibility depends on the exact software version and configuration. Check the live Jump‑IT creation flow before purchasing and contact Jump‑IT Support when a tool requires GPU acceleration, virtualisation, special drivers, unusual ports or more storage.
SEE THE PRODUCT IN ACTION
From the first choice to the next working session.
These recordings show the current Jump-IT interface with demonstration data. Use the controls to pause, replay or view a recording full screen.
PRODUCT WALKTHROUGH27 seconds
Create your Jump-Desk
Name your desktop, choose a region and plan, and review the configuration before checkout.
Read the walkthrough
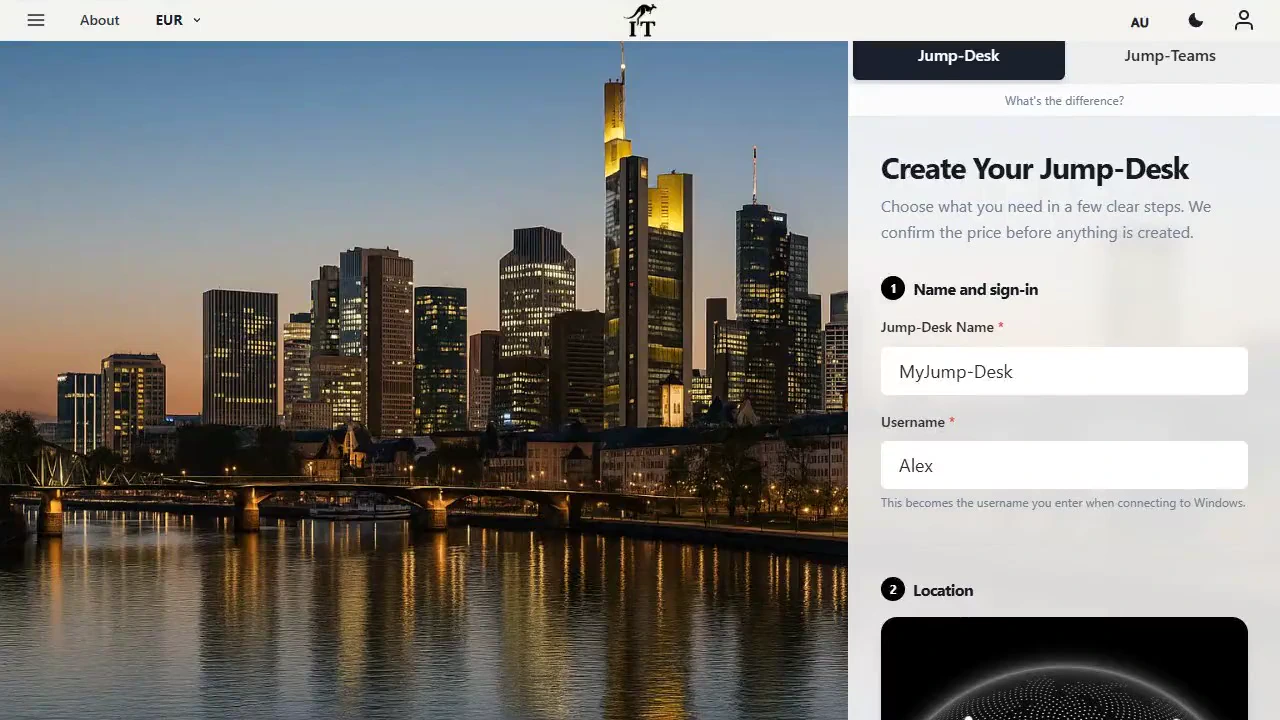
Start with your Windows sign-in After signing in to Jump-IT, give the desktop a name. This username is for Windows.
Choose a nearby region Pick from the regions available to your account. Your desktop will run in that region.
Choose how you use it This example uses Monthly. Review the current price and included uptime before checkout.
Choose the power for your work Compare the available CPU, memory and storage. Example prices are shown in this recording.
Review before you pay Check the total and terms, then continue to checkout. This demonstration stops before payment.
PRODUCT WALKTHROUGH31 seconds
Set up your laptop connection
Find the display settings, adapt the connection to your screen, and download the connection file.
Read the walkthrough
Find your desktop controls The settings menu sits on your desktop card. Open Connection Settings.
Fit Windows to your screen Review full-screen, monitor and resizing options. Support depends on your remote desktop client.
Choose your display preference Smart sizing fits the remote desktop to the client window. Other settings can stay at their defaults.
Keep the settings and connect Select Done, then Connect. The settings are included in your next connection file.
Open the file in your client Choose Download & Connect, then open the file with a supported remote desktop app.
Continue on your computer Sign in to the remote desktop with your Windows account. This final step is a connection guide.
Review the desktop configuration before checkout. Demonstration data. Open the image to inspect the controls.
CURRENT WORKFLOWS · SEPTEMBER 2026
AI-assisted work can still include a Windows-only step.
An assistant can help draft a report, explain a formula or plan a workflow, while the final task still depends on a Windows desktop application, plug-in or client system. Start with that application and its requirements. A browser-based assistant alone is not a reason to add another computer; a compatible Windows-only workflow may be.
A retained Jump-Desk keeps that Windows environment available between sessions. For colleagues doing the same kind of work, Jump-Teams adds invitations, roles and desktop assignments. AI subscriptions, Microsoft 365 and other paid applications require their own licences; a cloud PC does not include those subscriptions or promise specialist GPU hardware.
Bring people and desktops together.
Read the business guide to invitations, roles, funding and desktop assignments.
Jump-Desk setup: desktop name, Windows username and location. Demonstration data.
Prepaid Hours: budget for both parts.
Eligible Hours desktops use prepaid funding. Compute charges apply while running, and the separate service charge continues while the desktop is retained. Stopping the desktop preserves its files and ends running compute charges; deleting it permanently removes the desktop. Review the wallet, current rates and funding permissions in Jump-IT before creating one.
For regular work, Months includes up to 300 hours of uptime per desktop each month. Review the current Years option when a longer commitment suits the requirement. Each desktop has its own plan, region and performance tier.
Give your current device a Windows development workspace.
Create a persistent Windows 11 Pro Jump‑Desk for a Windows-only toolchain, temporary project or separate test environment—then connect from the device you already use.
The GPT-6.1 Terra Windows-workflow guide brings together launch data and independent evaluations, then follows a field-service client from an AI-assisted brief through a real Windows build, acceptance checks and Team handover. Use the workflow with your chosen model and tools.
Local AI development and a separate team build environment
The Surface Laptop Ultra guide examines CUDA and Windows on Arm checks; the touchscreen MacBook Pro guide covers the Apple-silicon alternative. Choose each project’s execution environment explicitly. Keep local model experiments, Windows builds, repository access and acceptance evidence separate, and validate the actual dependency stack before committing to hardware or cloud capacity.
Related device guidance added 31 October 2026.
This site uses essential storage and optional analytics. Privacy policy