How to Run Windows on iPad:A Complete Step-by-Step Guide
Use your iPad to connect to a Windows 11 Pro cloud PC. Windows runs remotely; this guide takes you from choosing a Jump-Desk to the connection steps in a supported client.
Guide order and plan choices reviewed: 3 November 2026
9-step illustrated guide
Windows 11 + Microsoft Windows App
Your iPad. Your Windows workspace.
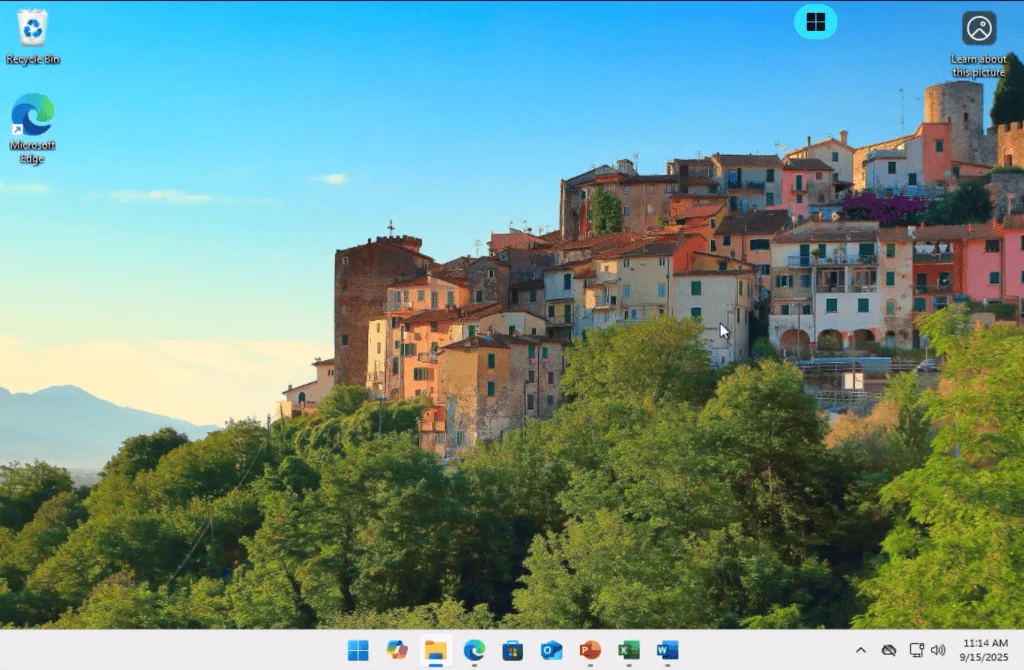
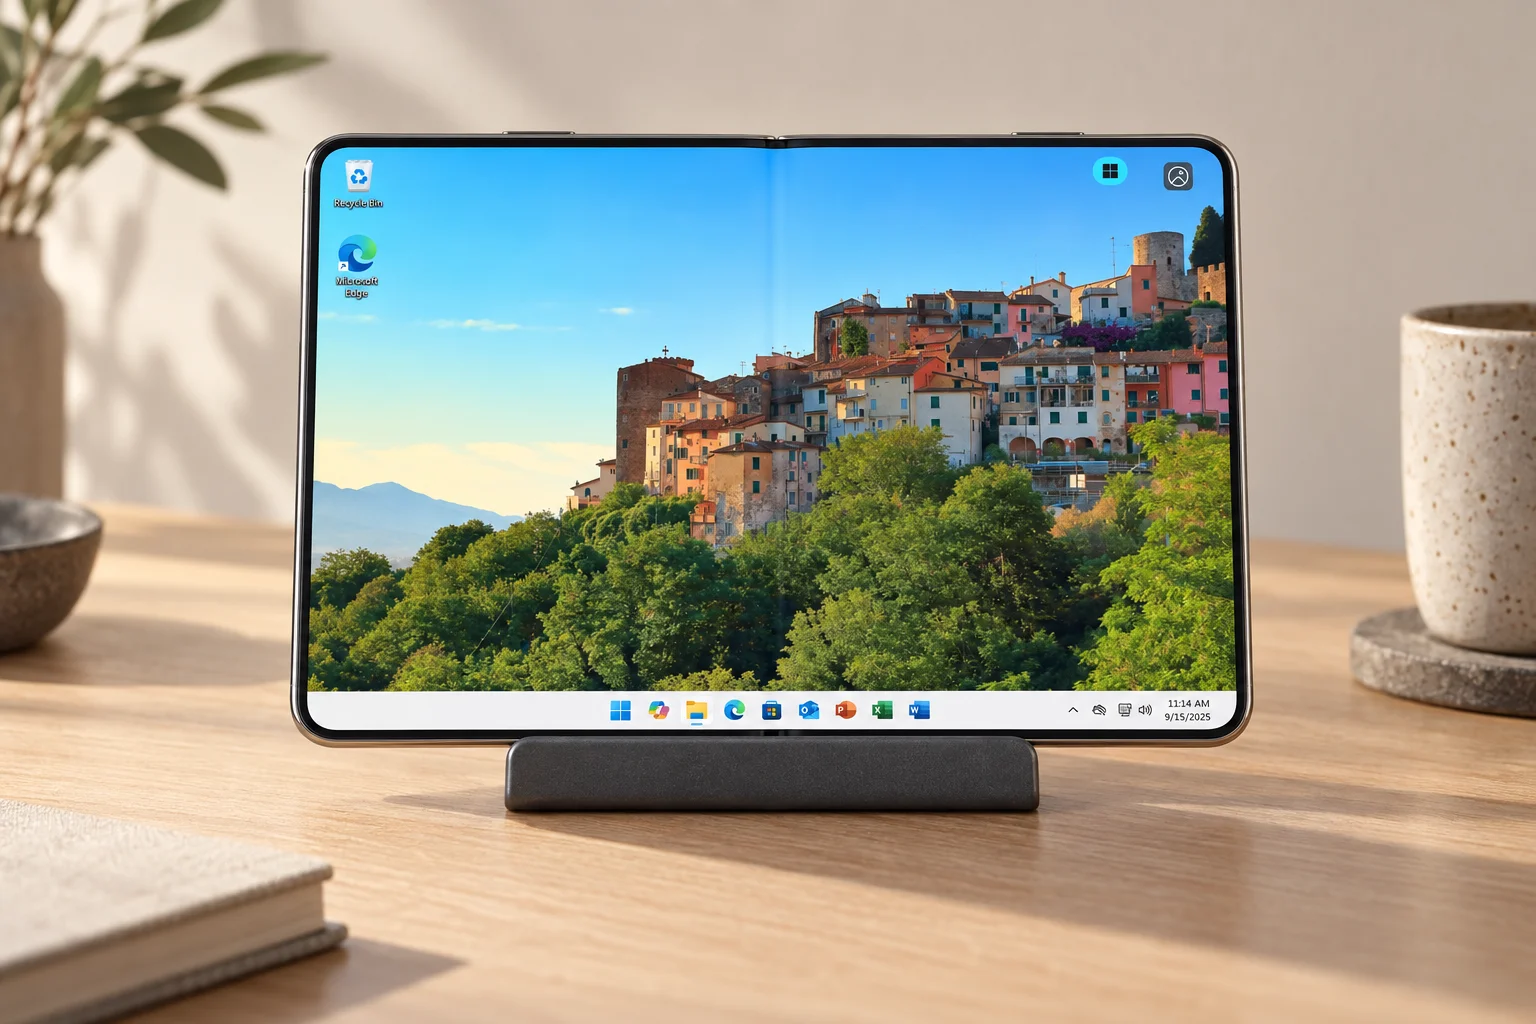
Windows 11 through the remote client on iPad. Interface details may vary.
Windows 11 ProYour own applicationsOne familiar device
TLDR
To run Windows on an iPad, create a Windows 11 Jump‑Desk, install Microsoft Windows App Mobile from the App Store, start the Jump‑Desk, download its connection file and open that file in Windows App. Your iPad becomes the screen and controls for the remote Windows computer.
BEFORE YOU CHOOSE
Keep the iPad. Add the Windows application.
This can suit a Windows-only task that your iPad or browser app cannot complete. Use a supported remote desktop client and a reliable internet connection; a keyboard and pointer can make desktop work easier.
Check your exact app, licence, iPad and accessories before committing to the workflow.
No account needed for the estimate. Current regional prices, available configurations and the final checkout total determine your purchase.
Before you begin
What you need before you start
An actively supported iPad with iPadOS 26 or later for the current app. The current Windows App Mobile listing requires iPadOS 26. Check the App Store compatibility section on your own iPad before creating a desktop. Check current compatibility.
A stable internet connection. Remote desktop quality depends on latency, stability and available bandwidth—not only headline download speed.
A Jump‑IT account and Jump‑Desk. If you only need Windows occasionally, compare the Hours plan with the monthly plan before committing to a longer subscription.
Microsoft Windows App Mobile. It is free from the App Store. Use the official app published by Microsoft Corporation.
Licences for any paid software you install. Jump‑Desk includes its stated Windows 11 Pro licence, but it does not automatically include Microsoft 365, Adobe applications or other paid software.
A keyboard and pointer for serious work. A Magic Keyboard, Bluetooth keyboard, mouse or trackpad makes Windows desktop software considerably easier to use.
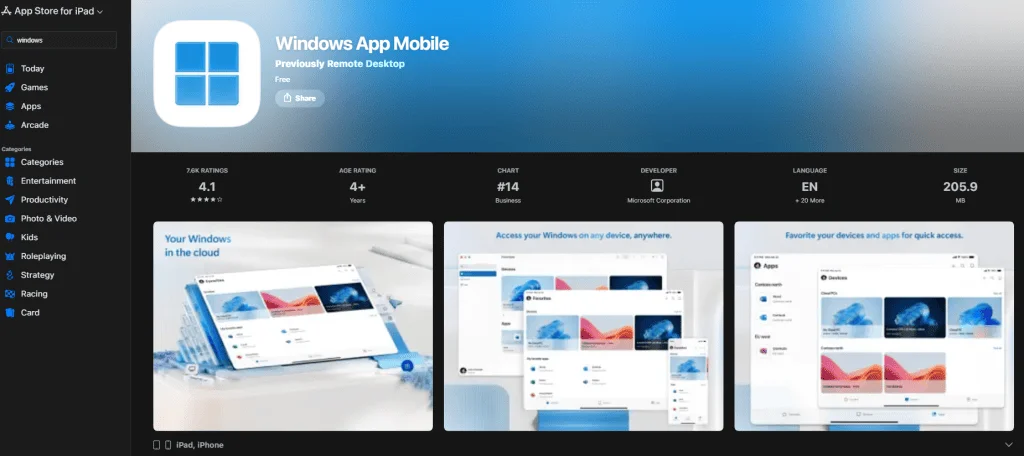
Open the App Store and install Windows App Mobile from Microsoft Corporation. It was previously named Microsoft Remote Desktop or Remote Desktop Mobile, so older tutorials may use those names.
You do not need to sign in to Windows App with a Microsoft work or school account merely to connect to a Jump‑Desk as a remote PC. Install the app first; the Jump‑Desk connection file will open in it later.
If Windows App asks for Bluetooth or local-network permission, allow the access you intend to use. Bluetooth permission is relevant if you connect a Bluetooth keyboard, mouse or another supported accessory.
Microsoft Windows App Mobile. App Store appearance may change.
02
Step 2: Create your Jump‑Desk and choose a configuration
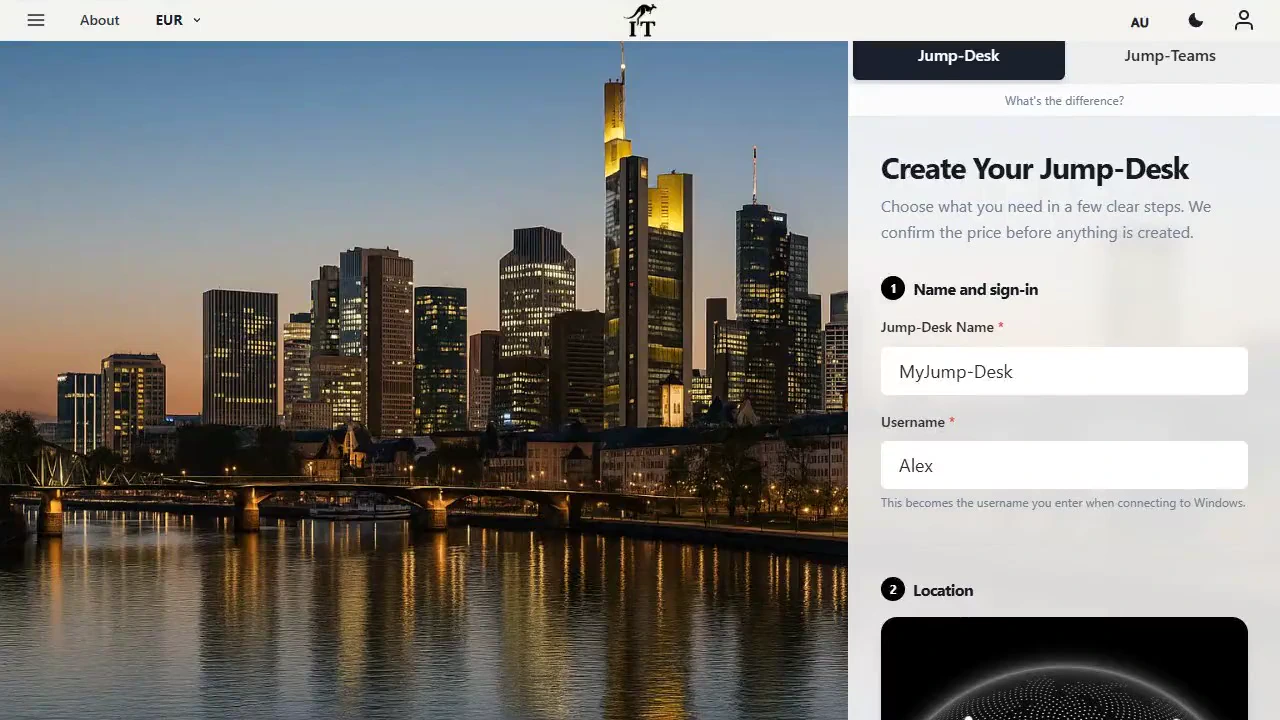
Go to Jump‑IT, create an account and select Create Jump‑Desk. You will choose an available location, billing plan and performance tier. Check the live price shown during creation because prices vary by location, tier, plan and currency.
Which plan should you choose?
On smaller screens, swipe sideways to compare every column.
How to run Windows 11 on your iPad with Jump‑Desk
Plan
Usually makes sense when
Hours
You need Windows irregularly or for short projects and can reliably stop the machine after use. Usage is charged while it is started and running; a separate service fee applies for persistent storage and the public IP while the Jump‑Desk exists.
Months
You expect regular use during a particular month and want a predictable subscription with the stated monthly uptime allowance.
Years
You require ongoing access throughout the year and the annual commitment is better value for your actual usage pattern.
Start with the workload, not the biggest tier
For browser, Office and light administrative work, begin by reviewing Standard. Jump‑IT currently lists Standard with 2 vCPU, 4 GB RAM and 128 GB storage. Choose Pro or Pro+ when your applications genuinely need more memory, CPU capacity or faster storage.
Choose the plan and performance tier that fit how often you need Windows and what your applications require.Choose your Jump-Desk
03
Step 3: Select the closest suitable location
Choose an available location reasonably close to where you will normally use the iPad. Physical distance is not the only cause of latency, but a closer region usually gives the connection a better starting point. Available locations can change, so use the live choices shown during creation rather than relying on an old region list.
04
Step 4: Wait for provisioning, then start the Jump‑Desk
Complete checkout and allow Jump‑IT to create the Windows environment. Provisioning time can vary with the selected location and current cloud capacity. Keep the dashboard open until provisioning has succeeded.
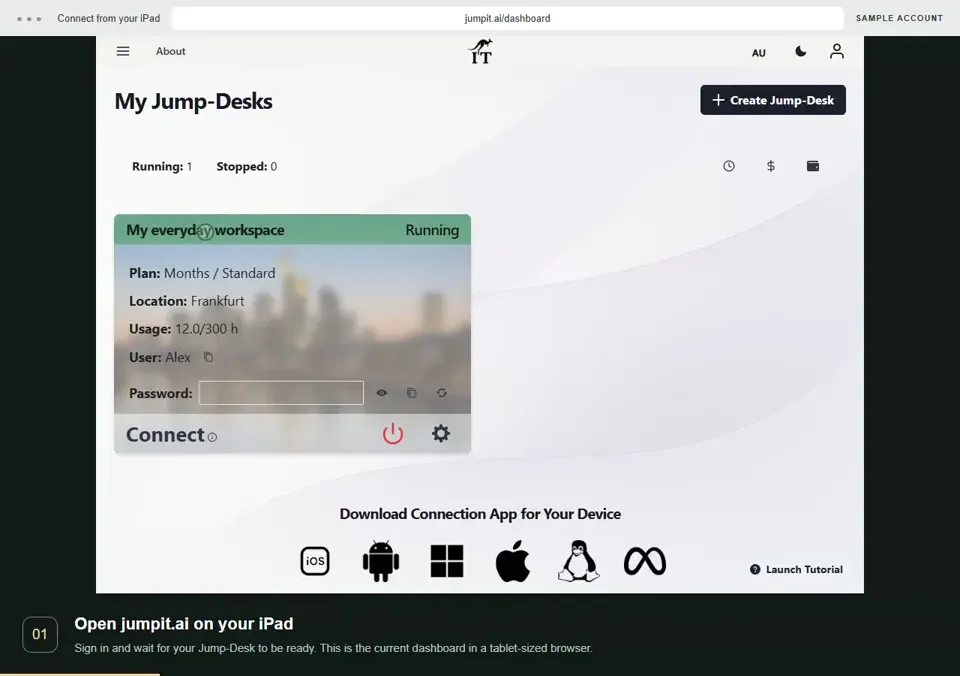
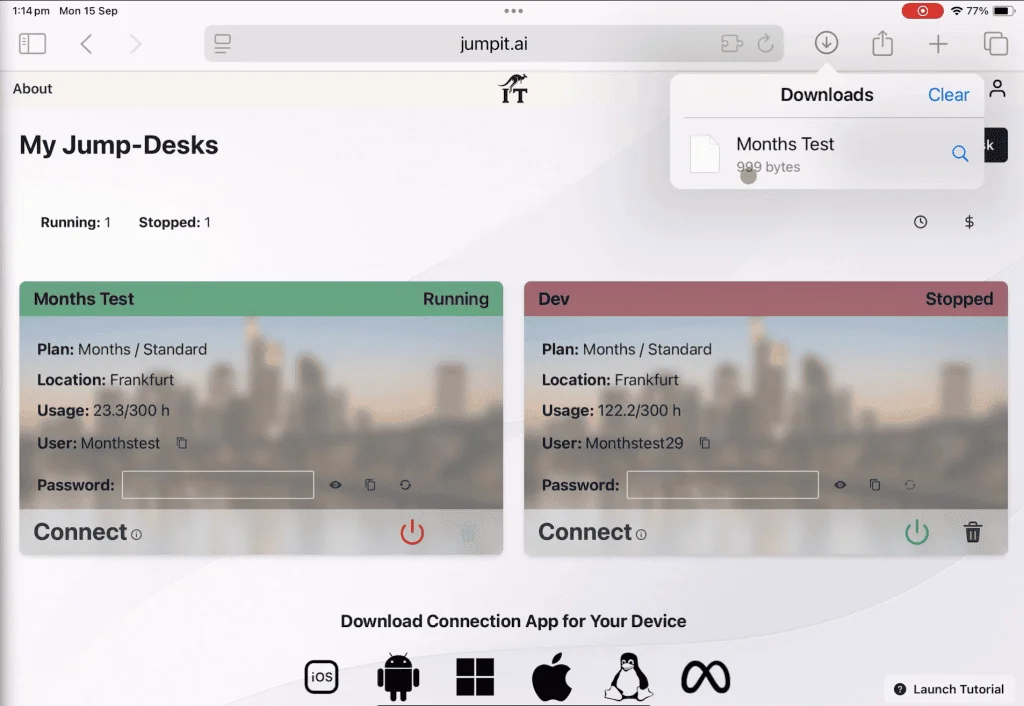
From the Jump‑IT dashboard, select your Jump‑Desk and use the power control to start it. Wait until its status is Running before attempting to connect. The dashboard also shows the Windows username and provides controls to reveal, copy or reset the password. Keep these credentials private because they provide administrative access to the Windows machine.
If provisioning fails
Do not repeatedly create another machine while the first is still being prepared. Check the displayed status and contact support rather than paying for an unnecessary duplicate.
Jump-Desk dashboard from the iPad walkthrough. Demonstration data.
05
Step 5: Download the connection file on the iPad
With the Jump‑Desk running, select the dashboard’s connection or download control. Jump‑IT generates an .rdp connection file containing the settings needed to reach that Jump‑Desk.
If Safari asks whether to download the file, confirm the download. Open Safari’s Downloads list or the iPad Files app and select the .rdp file. If iPadOS asks which app to use, choose Windows App. You can also use the Share menu and choose Open in Windows App if it is offered.
Earlier iPad capture showing the connection workflow. Interface details may vary.
06
Step 6: Connect and enter your Windows credentials
Windows App may ask you to confirm that you trust the remote PC. Check that you opened the connection file generated by your own Jump‑IT dashboard, then continue.
When prompted, enter the Jump‑Desk username and password shown in the dashboard. These are the remote Windows credentials; they are not necessarily the same as your Jump‑IT account password or Apple ID. After authentication, the Windows 11 desktop will open on the iPad.
07
Step 7: Make Windows comfortable to use on an iPad
Connect a physical keyboard and mouse or trackpad.
Use landscape orientation for more horizontal workspace.
Keep dynamic resolution or smart sizing enabled so the Windows desktop fits the available iPad window.
Use full screen when you want the iPad dedicated to Windows.
Enable only the local resources you need, such as clipboard, microphone or camera.
If you use an external display, configure it through iPadOS and Windows App. The exact layout depends on the iPad model, iPadOS version, display and Windows App version.
Windows App supports features including audio and video streaming, clipboard and folder redirection, microphones, cameras and external monitors. A specific feature still depends on the client, connection settings and remote application. See the official Windows App Mobile listing.
Illustrative workspace.
08
Step 8: Install the Windows applications you need
Inside the session, use the Jump‑Desk like a Windows PC. Download and install compatible applications, sign in with your own software licences and save your work to the Jump‑Desk or an appropriate cloud-storage service.
Do not assume every Windows program will work perfectly. Applications that depend on a physical USB device, specialist driver, hardware licence dongle, anti-cheat system or unsupported graphics hardware may not work through a remote session. Check the software vendor’s system and licensing requirements before choosing a tier.
09
Step 9: Save your work and stop the machine
This is the most important cost-control step. Closing Windows App or disconnecting the remote session does not necessarily stop the Jump‑Desk. If an Hours machine remains running, running-time charges can continue.
Save your work.
Shut down Windows from the Start menu, or use the power control in the Jump‑IT dashboard.
Check that the dashboard changes from Running to Stopped.
Cost warning
Treat “disconnect” and “stop” as different actions. Disconnecting closes your view. Stopping powers down the cloud computer.
Watch the connection
How to Run Windows 11 on iPad with Jump‑Desk
PRODUCT WALKTHROUGH28 seconds
Connect from your iPad
Follow the dashboard in a tablet-sized browser, then see the steps to continue in Windows App on iPad.
Read the walkthrough
Open jumpit.ai on your iPad Sign in and wait for your Jump-Desk to be ready. This is the current dashboard in a tablet-sized browser.
Install the connection app Use the iPhone / iPad download link for Windows App. Windows runs on your Jump-Desk.
Use your Windows sign-in Use the username and Windows password from your desktop. Keep the password private.
Prepare the connection Choose Connect and review the connection information. Check the host identity when your client prompts you.
Get your connection details Download the connection file. Use its host address when adding a PC in Windows App on iPad.
Continue on your iPad In Windows App, add the PC, save it and connect using your Windows account. This final step is a guide.
Watch the complete workflow, then use the written setup steps for configuration details, cost controls and troubleshooting.
YOUR WORKING PATTERN · OCCASIONAL, RECURRING OR TEAM
Choose a plan for the Windows work you need.
Start with your expected running hours and how long you will keep the desktop. Hours can suit occasional work; Months offers a full monthly subscription for recurring work. Choose personal access or Jump-Teams separately from the billing plan. Check the available region, performance tier and complete total before purchase.
Occasional or uncertain Windows work
Compare prepaid Hours when you need one Windows application, a short project or an irregular routine. Its complete cost is running compute plus a service charge for every retained hour, including when stopped.
Check both rates and your retained days. Wallet funding can differ from estimated consumption. Save your work and stop the desktop after each session; the retained service charge continues.
My own recurring Windows work
Choose a personal Months desktop when you manage your own applications, files and Windows sign-in. Keep the project environment available between sessions and reconnect from your supported iPad client.
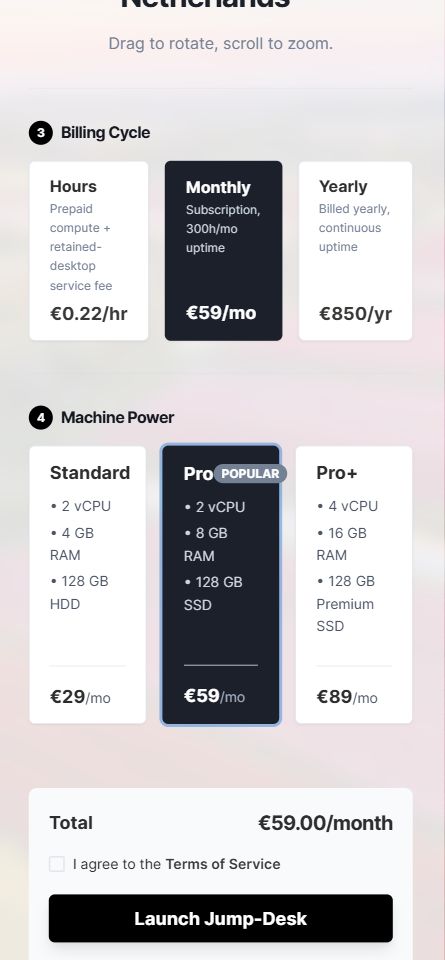
After signing in: check Jump-Desk, Monthly, region and tier. The displayed monthly price is per desktop for the full billing cycle, with up to 300 hours of uptime.
Windows work for colleagues
Use Jump-Teams when an owner needs to organise people and desktops. Select an existing Team you can manage, or follow the first-Team setup. Compare Hours for occasional work with Months for recurring roles; decide Windows access separately from Team responsibilities.
Creating a Team is free; each desktop has its own paid plan. Hours includes running compute plus retained service, even when stopped. Months charges the full monthly fee with up to 300 uptime hours per desktop. One person can actively use a Windows desktop at a time; plan separate desktops for simultaneous workers.
Compare complete costs for either access route. The live cost calculator includes running compute and retained service for Hours and the full Months charge. Months is not automatically cheaper. Add applicable taxes, software licences and optional extras; confirm the final checkout total. Creating a Team does not change either charging model.
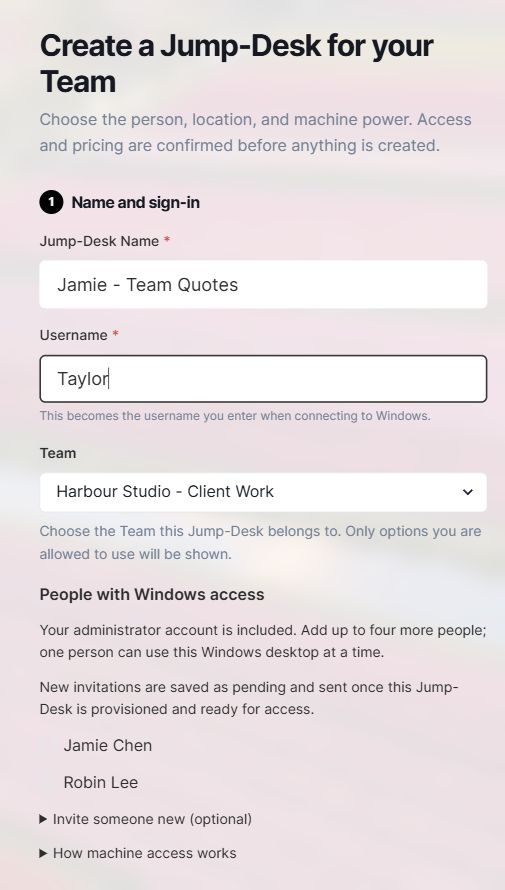
Fresh actual-product local demonstration, 23 October 2026. Netherlands Pro is EUR 59 for the full month. The Hours card shows compute only; its retained-desktop service charge is additional. No purchase was submitted. Select to enlarge.Fresh actual-product local demonstration with fictional Harbour Studio people and project data. Team selection and Windows access are separate controls; no invitation, access grant or desktop creation was submitted. Select to enlarge.
Make the first desktop a useful working check
Name the job. For a client quotation, identify the chosen costing application, workbook add-ins, proposal template and export destination. Confirm software licensing and remote-PC requirements; those applications are installed and configured by you.
Prepare the setup. Choose a valid Windows username, a suitable available region and enough memory for the actual application. In Team setup, select or create the Team before expecting its desktop choices. Resolve any field validation before continuing.
Check the complete result on your iPad. Follow the nine connection steps, then open, edit, save, export and reopen a permitted example of the real project. Check your keyboard, pointer and essential peripherals on the network you expect to use. The application acceptance worksheet helps record what passed.
Plan the next month. Record the desktops needed for simultaneous work, each full monthly charge, software licences, taxes and any extras. Use the Team Months budget guide and iPad Teams access guide. Save work, export a separate backup and stop the desktop when the session ends; closing Windows App alone does not stop it.
The images demonstrate Jump-IT setup controls, not a completed Windows application task or an iPad hardware test. Availability, payment and access must be confirmed for your own account.
Using an iPad for recurring team work
An iPad can be the connection device for a business Windows environment that is used throughout the month. For example, an operations colleague may keep licensed quotation, costing and document applications on a Jump-Desk, then reconnect to continue the same project. Windows runs on the remote computer; installing Windows App does not install those business applications on the iPad.
Check Microsoft’s current Windows App Mobile compatibility requirements on the intended device. Rehearse the actual application, keyboard or pointer, network and any required peripheral before choosing an ongoing plan. A supported client is not a guarantee that every Windows workflow is comfortable on a tablet.
For a team, give the colleague their own Jump-IT identity and appropriate Windows access. Team roles are separate from Windows privileges and application permissions. One active Windows user can use a Jump-Desk at a time. The iPad Teams guide covers this team-specific path.
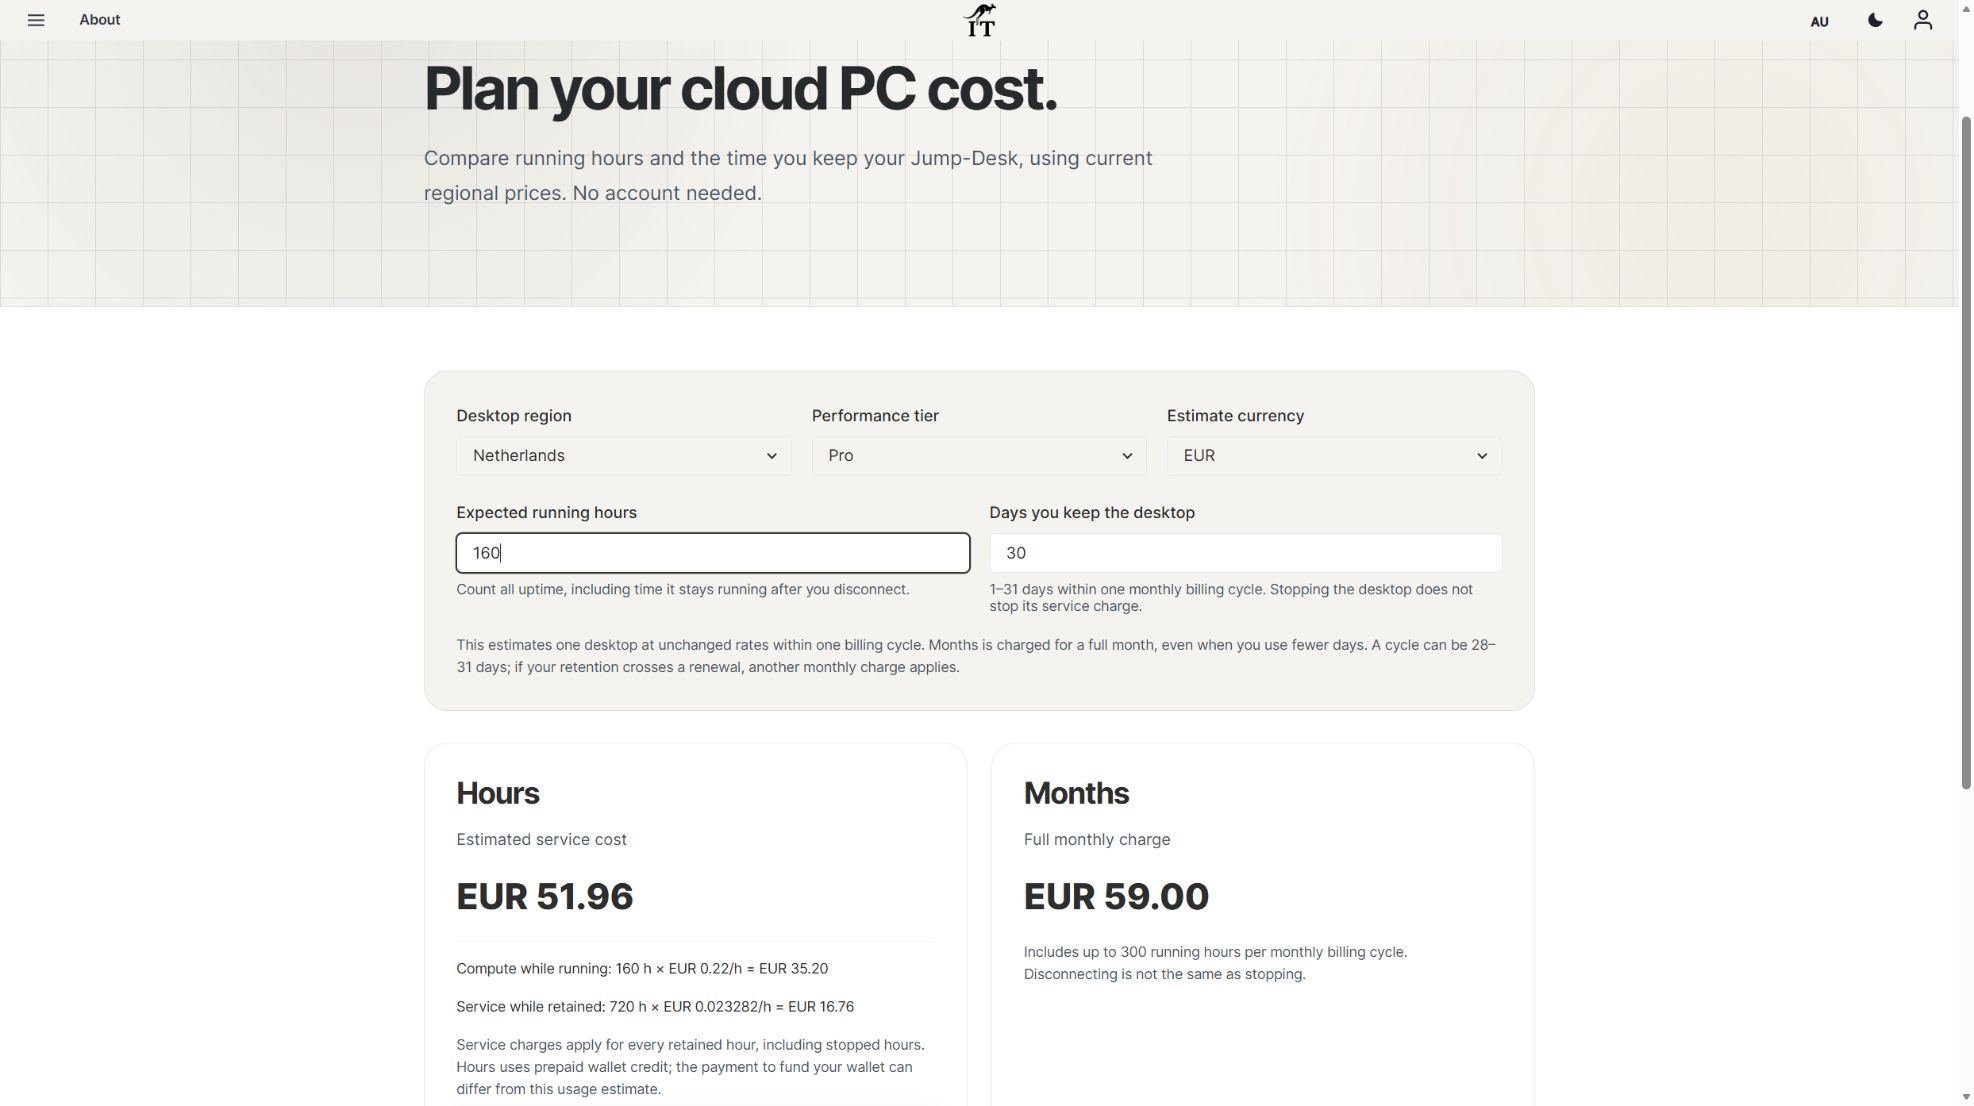
Actual calculator demonstration, 17 October 2026. The full monthly price stays EUR 59 even when a lighter-use Hours estimate is lower. Example only; check current regional prices. Select to enlarge.
For recurring use, compare Months with the full Hours estimate. Months charges the full monthly price with up to 300 uptime hours per desktop. Hours charges running compute plus service while retained, including when stopped. The current example above shows why a lighter-use person may still favour Hours. Use the team budget worksheet for ongoing roles, and save and stop the desktop when work finishes; closing the iPad app is a different action.
Yes, you can use a full Windows 11 desktop on an iPad. Windows is not installed directly on the iPad. Instead, a Jump‑Desk runs Windows in the cloud, while Microsoft’s Windows App displays and controls it from your iPad. In practical terms, it works as an on-demand cloud PC for iPad, giving you access to compatible Windows desktop apps without installing Windows locally.
For occasional or part-time PC use, this can be more practical than buying, maintaining and carrying a second computer. You start your Jump‑Desk when you need Windows, use your desktop applications and files, then stop it when you finish. You will need a reliable internet connection, and the experience is best with a keyboard and mouse or trackpad.
A full Windows 11 desktopUse compatible desktop applications and familiar Windows workflows from the iPad you already own.
Official Microsoft clientConnect through Microsoft Windows App Mobile rather than an imitation Windows interface.
Made for part-time PC useStart Windows when a task needs it, keep the same workspace and stop the cloud computer when finished.
Best for: people who mainly use an iPad but occasionally need a Windows-only application, a full desktop browser, desktop file management or a temporary Windows workspace.
What runs Windows: your cloud-hosted Jump‑Desk—not the iPad itself.
What you install on the iPad: Microsoft Windows App Mobile, previously called Remote Desktop Mobile.
What you need: a supported iPad, internet access and a Jump‑IT account.
Best accessories: a keyboard and mouse or trackpad. Touch works, but most desktop software is designed around a pointer and keyboard.
Not ideal for: offline work, highly latency-sensitive tasks, specialist USB hardware or software that requires hardware not included with your selected Jump‑Desk.
How it works
What “Windows on iPad” actually means
An iPad does not natively boot or install the standard PC version of Windows. Jump‑Desk uses remote desktop technology: Windows runs on a remote computer, and your iPad receives the picture and sends back your keyboard, pointer and touch input.
Microsoft describes Windows App as software for connecting remotely to Windows devices and applications. It officially supports iOS and iPadOS, including direct connections to remote PCs. Read Microsoft’s Windows App overview.
Good to know
Jump‑Desk is not an iPad Windows emulator and it does not replace iPadOS. You can switch between your normal iPad apps and Windows App whenever you need to.
Your iPadThe screen, keyboard and pointer
Internet connectionA stable connection while you work
Your Jump-DeskWindows, applications and files
YOUR NEXT STEP
From an iPad to your Windows session.
Create the desktop in Jump-IT, then use its connection details in the supported Windows App client. A keyboard and pointer make desktop work easier; Windows runs remotely, not on iPadOS.
Jump-Desk dashboard in a tablet-sized browser, from the iPad walkthrough. Product capture with demonstration data. Select to enlarge.
Made for your everyday device
Why this can be better than buying a Windows laptop for part-time use
If the iPad already handles most of your work, a second computer creates another purchase, charger, battery, operating system and device to maintain. Jump‑Desk adds Windows as an on-demand workspace instead.
Keep using the iPad you already own
Your iPad remains your everyday device. Open Windows only for tasks that genuinely require it, then return to iPadOS for everything else.
Use full desktop software instead of a reduced mobile substitute
Some iPad apps are excellent, but mobile and web versions can omit desktop features, extensions or established workflows. A Jump‑Desk provides a Windows 11 environment where you can install compatible desktop software instead of forcing every job into an iPad-native alternative.
Avoid a large upfront purchase for a short-lived need
For a temporary project or irregular use, an hourly cloud desktop can be financially rational because it avoids buying a PC that spends most of its life unused. It is not automatically cheaper in every case: frequent, long sessions can eventually make owning a Windows computer the better-value choice.
Keep the same Windows workspace between sessions
Your installed applications, settings and files remain on the Jump‑Desk while the machine exists. Stopping it ends the running session; it does not wipe the desktop. Deleting the Jump‑Desk is different and permanently removes its resources, so export anything important first.
Choose what fits
Jump‑Desk, native iPad apps or a Windows laptop?
On smaller screens, swipe sideways to compare every column.
Jump‑Desk, native iPad apps or a Windows laptop?
Your situation
Most sensible starting point
The task works fully in an iPad app or browser
Stay with the native iPad solution. It is simpler and works better offline.
You occasionally need a Windows-only program or full desktop feature
Jump‑Desk is the strongest fit. It adds Windows without requiring another physical computer.
You work in Windows for most of every day
Compare the total Jump‑Desk cost with buying a suitable Windows PC. Ownership may be cheaper over time.
You need Windows without reliable internet
Buy or use a physical Windows computer. Remote desktop is the wrong tool.
You need specialist USB, PCIe or other physical hardware
Use a physical machine known to support that hardware.
You need highly latency-sensitive gaming or professional real-time media work
Test the exact workload first. A general cloud desktop and remote connection may not meet the requirement.
You need Windows for a course, contract or short project
An hourly or time-limited Jump‑Desk avoids buying a machine for a temporary requirement.
Keep the costs clear
How to keep an hourly Jump‑Desk economical
Estimate both the time Windows runs and the time you keep the desktop. For example, eight running hours with the desktop retained for seven full days means eight compute hours and 168 service hours. Retained time includes the running time; the service charge also continues while the desktop is stopped.
Compare an illustrative seven-day pattern
Part of the comparison
Illustrative input
Hours compute
8 × the current hourly compute rate
Hours service
168 × the current hourly service rate
Months
The full monthly price for the same region, tier and currency, with up to 300 uptime hours per desktop per month
This is a usage pattern, not a price quotation or a claim that one plan is always cheaper. Do not prorate the monthly price to seven days. Use the live cost calculator for your own routine, then review availability, applicable tax and the final checkout terms. Choose capacity against the application’s requirements; save your work and confirm Stopped when you finish. Export what you need before deleting a desktop, because deletion removes it.
StoppedRetained-desktop serviceRunning compute ends; the desktop is still retained.
Eligible Hours desktops use prepaid funding. Compute charges apply while running, and the separate service charge continues while the desktop is retained. Stopping the desktop preserves its files and ends running compute charges; deleting it permanently removes the desktop. Review the wallet, current rates and funding permissions in Jump-IT before creating one.
For regular work, Months includes up to 300 hours of uptime per desktop each month. Review the current Years option when a longer commitment suits the requirement. Each desktop has its own plan, region and performance tier.
From the first choice to the next working session.
These recordings show the current Jump-IT interface with demonstration data. Use the controls to pause, replay or view a recording full screen.
PRODUCT WALKTHROUGH27 seconds
Create your Jump-Desk
Name your desktop, choose a region and plan, and review the configuration before checkout.
Read the walkthrough
Start with your Windows sign-in After signing in to Jump-IT, give the desktop a name. This username is for Windows.
Choose a nearby region Pick from the regions available to your account. Your desktop will run in that region.
Choose how you use it This example uses Monthly. Review the current price and included uptime before checkout.
Choose the power for your work Compare the available CPU, memory and storage. Example prices are shown in this recording.
Review before you pay Check the total and terms, then continue to checkout. This demonstration stops before payment.
PRODUCT WALKTHROUGH31 seconds
Set up your laptop connection
Find the display settings, adapt the connection to your screen, and download the connection file.
Read the walkthrough
Find your desktop controls The settings menu sits on your desktop card. Open Connection Settings.
Fit Windows to your screen Review full-screen, monitor and resizing options. Support depends on your remote desktop client.
Choose your display preference Smart sizing fits the remote desktop to the client window. Other settings can stay at their defaults.
Keep the settings and connect Select Done, then Connect. The settings are included in your next connection file.
Open the file in your client Choose Download & Connect, then open the file with a supported remote desktop app.
Continue on your computer Sign in to the remote desktop with your Windows account. This final step is a connection guide.
Review the desktop configuration before checkout. Demonstration data. Open the image to inspect the controls.
CURRENT WORKFLOWS · SEPTEMBER 2026
Put it into practice
An iPad workflow that goes beyond opening the desktop.
Picture a consultant using an iPad between client visits while keeping a complete Windows workspace for desktop Excel, a specialist business application and project folders. Prepare the applications and accounts the role needs on a Jump-Desk. For example, update a client quotation in a permitted copy of the actual workbook, check its required add-ins and produce the customer-ready PDF. This checks the working process the consultant needs, including the application version, licence, input and file destination.
Check a complete iPad workflow
Check
What to verify
Application
The required version, add-ins and licence fit the intended remote or virtual Windows use.
Input and connection
The keyboard, pointer, display and essential accessories work through your supported client on your usual network.
Finished result
You can open the file, make the needed change, save, export and reopen the result where you will use it.
End of the session
You know where the file is saved and how to stop the desktop from the dashboard. Keep a separate backup/export process.
Windows runs on the cloud PC; iPadOS remains on your iPad. Offline work and specialist peripherals require a separate assessment. A successful application launch alone does not establish that the complete workflow fits.
Jump-Desk setup: desktop name, Windows username and location. Demonstration data.Using an iPad with colleagues?
For a colleague working from an iPad, Jump-Teams provides their own account and an assigned desktop. Confirm Windows access before the first appointment, keep the client up to date and agree when to stop the desktop. The recordings above show the actual setup and connection controls.
Bring people and desktops together.
Read the business guide to invitations, roles, funding and desktop assignments.
Install Windows App first. Locate the .rdp file in Safari Downloads or Files, open the Share menu and choose Windows App. If the original file is old or incomplete, download a fresh connection file from the Jump‑IT dashboard while the machine is running.
Windows App cannot connect to the Jump‑Desk
Check that the dashboard status is Running and allow a short period after startup before reconnecting. Some company, school, hotel and guest networks block Remote Desktop traffic, commonly outbound TCP port 3389. Try a trusted alternative network or personal hotspot. If that works, the original network policy is the likely cause.
The username or password is rejected
Copy the Windows credentials from the Jump‑IT dashboard and check for accidental spaces. Do not use your Apple ID or assume the Windows password matches your Jump‑IT login. If necessary, start the Jump‑Desk and use the dashboard’s password-reset function.
Windows text and controls are too small
Use landscape mode, full screen and Windows App’s display settings. Keep dynamic resolution and smart sizing enabled. Windows display scaling can also be increased inside the remote session, although changing it may require signing out and back in.
The picture freezes or the session disconnects
Check Wi‑Fi stability and latency. Move closer to the access point, stop bandwidth-heavy traffic or try another network. Windows App can reconnect after a brief interruption, but save work regularly.
Closing Windows App did not stop billing
That is expected if the app only disconnected. Open the Jump‑IT dashboard, stop the machine and verify that its status is Stopped.
A few useful answers
Frequently asked questions
Can Windows be installed directly on an iPad?
Not as a normal supported replacement for iPadOS. This method runs Windows 11 on a remote Jump‑Desk and displays it through Windows App on the iPad.
Is Jump‑Desk a Windows emulator for iPad?
No. The iPad is not emulating a PC processor or running Windows locally. It is remotely controlling a Windows cloud computer.
Can I install my own Windows applications?
Yes. You have administrative access and can install applications compatible with the Jump‑Desk’s Windows version and hardware. You remain responsible for each application’s licence and system requirements.
Do I need to sign in to Windows App with a Microsoft account?
Not for a direct remote-PC connection to a Jump‑Desk. Install the app, open the connection file from the Jump‑IT dashboard and enter the Windows credentials for that machine.
Can I use a keyboard, mouse and external monitor?
Windows App Mobile supports keyboard and pointer input and lists external-monitor support. Exact behaviour depends on your iPad, iPadOS version, accessories, display and Windows App version. A keyboard and mouse or trackpad are strongly recommended for desktop applications.
Does my work remain after I stop the Jump‑Desk?
The Jump‑Desk’s persistent storage remains while the machine exists, so stopping it should not erase installed applications or saved files. Deleting the Jump‑Desk is permanent. Keep a separate backup of important files.
Does disconnecting from Windows App stop hourly charges?
No. Disconnecting and stopping are separate. Stop the Jump‑Desk from Windows or the Jump‑IT dashboard and verify its status.
Is this always cheaper than buying a Windows laptop?
No. It is most compelling for temporary, irregular or part-time use. If Windows becomes your main daily environment, compare the full recurring cost with buying a suitable computer.
Will every Windows program and peripheral work?
No. Most ordinary Windows applications should behave as they do on a compatible PC, but specialist hardware, licence dongles, low-level drivers, anti-cheat systems and demanding graphics workloads can be incompatible. Test the real application before committing to a long plan.
Which iPads can connect to a Windows Jump‑Desk?
The current Windows App Mobile listing requires iPadOS 26 or later. Check its App Store compatibility section on your iPad before purchasing a Jump‑Desk. Windows runs remotely, but the iPad still needs a supported client, a stable connection and suitable accessories. Check the current requirement.
How much does it cost to run Windows on an iPad?
The total depends on your chosen location, plan, tier and running time. Hours is designed for irregular use, while Months and Years suit more frequent access. Check the live price and service fee before creating the Jump‑Desk rather than relying on an old price quoted in an article.
Written and maintained by Jump-IT
About this guide
Prepared and maintained by the Jump‑IT Team.
Reviewed and updated 8 September 2026. The product workflow and software requirements were checked against Jump‑IT’s current implementation and Microsoft’s current Windows App documentation.
If your iPad already does most of the job, you do not necessarily need to buy and carry a second computer for the remaining Windows tasks. A Jump‑Desk gives you a persistent Windows 11 workspace that you can open from the iPad, use for the project and stop when the work is done.
Check the live plan, regional price, included usage and service fee before purchase.
iPad access in a MacBook-led organisation
The touchscreen MacBook Pro team guide compares iPad, Neo, Mac mini and iPhone Duo as parts of a mixed-device workflow. A lead can use local Mac resources while an iPad connects to its own suitable Windows environment. The plan chooser above still applies; test keyboard, pointer, file movement and network conditions on the actual iPad.
Related device guidance added 31 October 2026.
Your next step: Windows on iPad with a team.
Adding colleagues or moving between an iPad, Mac and phone? Our guide to Windows on iPad for teams explains individual Windows access, switching devices, simultaneous work and the full cost.
Compare iPhone Duo, Galaxy Z Fold8 and Pixel for real work. New creator reviews, remote Windows limits and a practical path to a monthly cloud workspace.