
Bring people and desktops together.
Read the business guide to invitations, roles, funding and desktop assignments.
Explore Jump-Teams →

How To · Windows on Mac
Compare Parallels and local virtualisation, remote access to an existing PC, and a Windows cloud PC—then follow the exact steps to run Windows 11 on your Mac with Jump‑Desk.

You do not need to buy a separate Windows PC to use Windows applications on a Mac. You can run Windows locally in a virtual machine, remotely control a Windows PC that already exists, or connect to a cloud PC such as Jump‑Desk.
Jump‑Desk is the strongest fit for many occasional, mobile and Apple-silicon Mac users. Windows 11 Pro, the machine and its 128 GB drive live in the cloud; the Mac remains the access device. This preserves local storage and memory, avoids making the Mac host Windows on Arm, and lets the same desktop follow the user to other supported devices.
Parallels Desktop remains better when Windows is used heavily on one capable Mac and offline access, low local latency, Coherence mode or direct peripheral integration matters. Remote access is sensible when you already own or can legitimately use a Windows Pro PC elsewhere. The guide below shows all three routes, then demonstrates Jump‑IT step by step.
No second computerUse the Mac you already own as the local host or access device.
Three legitimate routesLocal virtualisation, remote access or a dedicated cloud PC.
Jump‑Desk flexibilityHours, Months or Years across 20 configured cloud regions.
Start with the execution model
The Windows desktop can live inside the Mac, on another physical PC, or in the cloud. Each choice has a different relationship with storage, internet access, Apple silicon and mobility.
Software such as Parallels Desktop creates a Windows virtual machine on the Mac. It uses the Mac’s CPU, memory, graphics and storage, but offers the strongest local integration and can work without a continuous internet connection after setup.
Best when: Windows is used frequently on one powerful Mac and offline access matters.
Microsoft Windows App on the Mac controls a physical Windows Pro PC elsewhere. The remote PC must already exist, remain powered and reachable, and be configured securely for Remote Desktop.
Best when: you already have legitimate access to a suitable Windows PC.
Jump‑IT creates a persistent Windows 11 Pro machine on cloud hardware. The Mac connects with a personalised RDP file, while Windows compute and storage remain remote.
Best when: you want flexible, cross-device Windows access without hosting the VM on the Mac.

YOUR NEXT STEP
Give the Windows-only task a separate desktop without allocating a local virtual machine on your Mac. Check the exact application and any peripherals before choosing remote Windows.
Configure your Jump-Desk
Decision guide
Compatibility comes first. Check the exact Windows application, plug-in, driver, USB device, graphics requirement and offline requirement before comparing prices.
Option 1 · Windows inside the Mac
Parallels Desktop 26 creates a Windows virtual machine on macOS. On an Apple-silicon Mac, its standard supported Windows guest is the Arm edition of Windows 11 Pro or Enterprise. Microsoft authorises this route, and Windows 11 Arm can emulate many x86 and x64 user-mode applications.
.pvm bundle.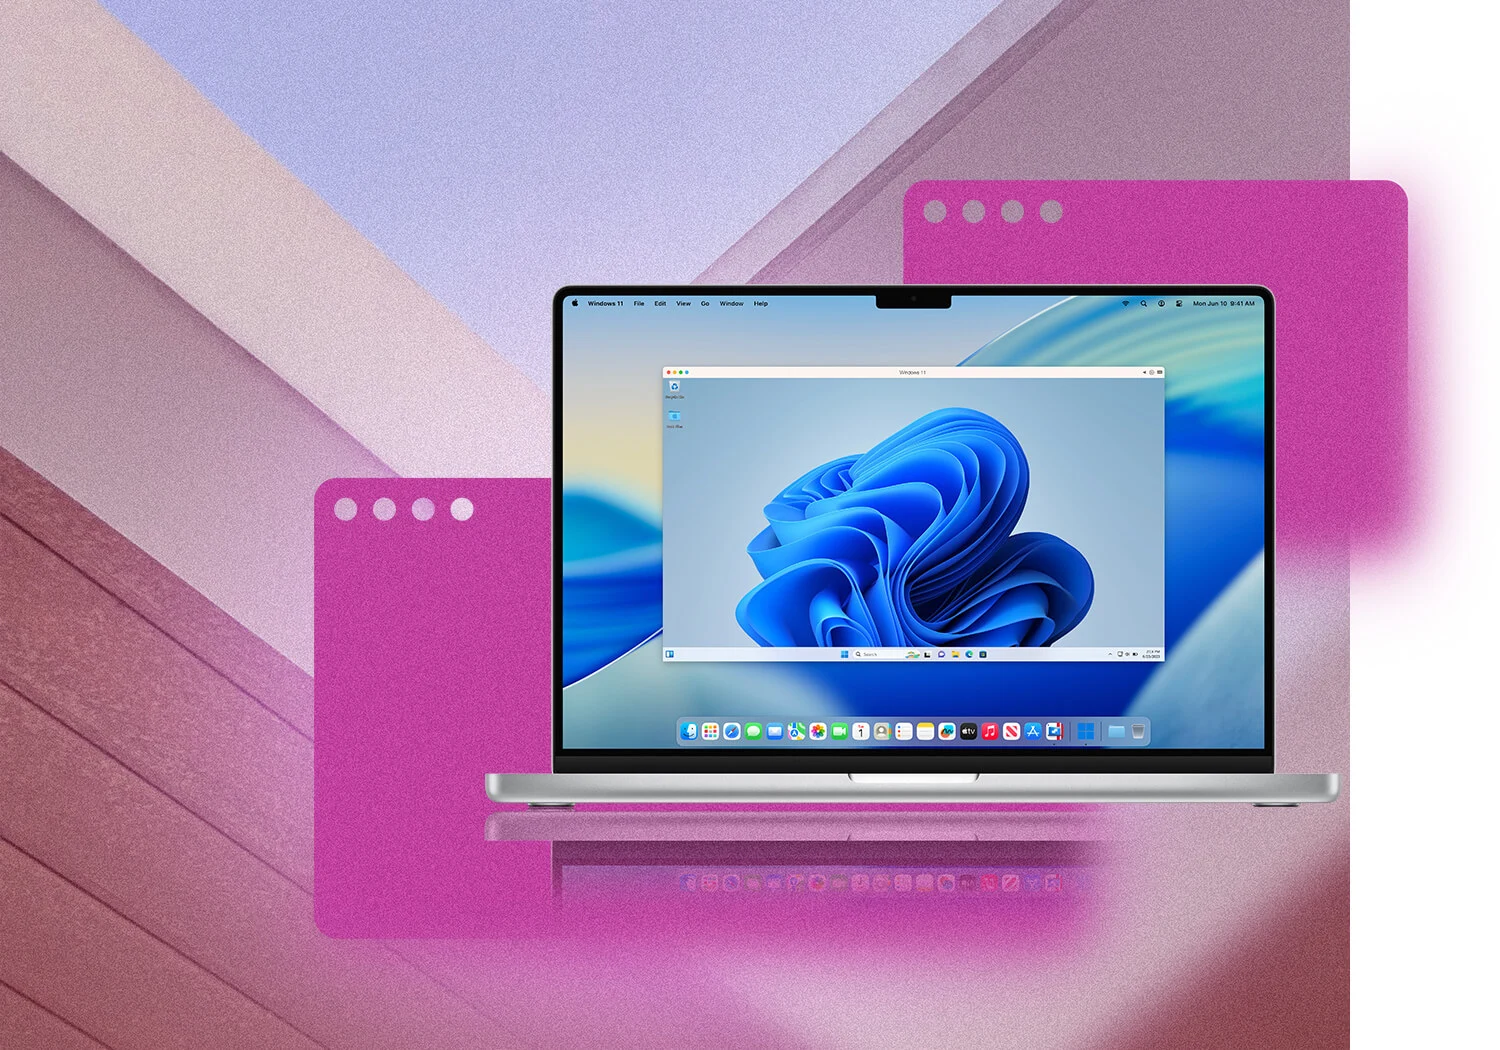
What about Boot Camp? Apple’s current guide limits Boot Camp installation to Intel-based Macs. It is a legacy local option for compatible Intel hardware, not the route for modern M-series Macs.
Option 2 · Reuse a Windows PC elsewhere
This option avoids buying another PC only if a suitable Windows machine already exists and you are authorised to use it.
Microsoft says Windows App on macOS can connect to a remote PC without signing in to the app with a work or school account.
Trade-off: this route still depends on a physical PC somewhere. If it is switched off, asleep, disconnected or broken, the Mac cannot use it remotely.
Option 3 · Put Windows in the cloud

Jump‑IT provisions a personal Windows 11 Pro desktop on Microsoft Azure. The Mac does not store or run the VM; it sends keyboard and pointer input and receives the remote display through Windows App.
Why this is particularly useful on Apple silicon: the M-series processor does not dictate the architecture of the remote Windows machine. The Mac is the client, so the Windows desktop is not a local Windows 11 Arm VM competing with macOS for memory and storage.
Step-by-step demonstration
The exact workflow below follows the current Jump‑IT product configuration and dashboard instructions.
Confirm the application supports Windows 11 and does not require offline access, a dedicated GPU, specialist PCIe hardware or unusually low latency. Current Jump‑Desk tiers are suited to compatible office, browser, development, testing and professional applications—not GPU-dependent gaming or rendering.
Open Create Jump‑Desk. Sign in or create an account, then begin a new Jump‑Desk configuration.
Select one of the 20 available regions. A geographically closer region will often reduce network latency, although real performance still depends on the route taken by your internet provider. Choose where you actually expect to connect from most often.
Choose Hours, Months or Years, then Standard, Pro or Pro+. Standard is for lighter work, Pro is a more comfortable starting point for everyday multitasking, and Pro+ provides 4 vCPU and 16 GB RAM for compatible workloads that need more headroom. The exact specifications are shown below.
Regional prices are loaded during configuration. Check the selected region, billing model, tier, currency, taxes and any service charge before confirming payment. Jump‑IT then provisions the Windows 11 Pro desktop; allow time for creation to complete.
Download Windows App from the Mac App Store. It is Microsoft’s current macOS client for remote PCs and Windows cloud services. A personal Microsoft account is not required merely to open a direct remote-PC connection.
Open the Jump‑IT dashboard and use the green power control on the Jump‑Desk card. Wait until its live status badge says Running. The Connect control and password-reset control become available while the machine is running.
Select Connect on the dashboard card to download the .rdp file. Open it with Windows App, accept the certificate prompt after confirming that you initiated this connection, and sign in with the username and password shown on the dashboard. The eye and clipboard controls help reveal and copy the credentials.
Install compatible Windows applications using the included administrator access. When an Hours session is finished, save your work, sign out or close the session, return to the Jump‑IT dashboard and use the red power control. Closing Windows App alone does not stop the cloud machine.
Cost-control rule: an Hours Jump‑Desk is charged for running usage while started, and a separate service fee covers retained storage and the public IP while the machine exists. Confirm Stopped status after every hourly session.
This recording shows Jump-IT dashboard controls in a tablet-sized browser and then iPad connection guidance. It is not a macOS or Mac Windows App capture. Follow the Mac setup steps in this section for the Mac client; the original iPad captions and walkthrough below describe the recording as filmed.
Jump‑IT product demonstration. Interface labels may evolve, but the current workflow remains choose, create, start, connect and stop.
Repository-verified configuration
All current tiers include Windows 11 Pro, administrator access, 128 GB storage and 100 GB of data transfer. The storage type, memory and CPU allocation differ.
For lighter office, browser and Windows-only tasks.
A sensible starting point for everyday multitasking and many compatible professional applications.
For compatible CPU- and memory-heavy work that benefits from more headroom.
On smaller screens, swipe sideways to compare every column.
| Billing model | Usually makes sense when | Important rule |
|---|---|---|
| Hours | Windows is needed irregularly, temporarily or for short projects. | Stop the machine from the dashboard after use; a retained-resource service fee also applies. |
| Months | You expect regular use during a particular month. | Current configuration includes 300 hours per month and automatic shutdown after three idle hours. |
| Years | You need longer-lived Windows access and the annual commitment suits the workload. | Review the current live product description and checkout terms before committing. |
Do not choose by plan name alone. Check the application’s real RAM, CPU, graphics, storage and network requirements. None of the three current advertised tiers lists a dedicated GPU.
Common Mac connection problems
Control-click the downloaded file, choose Open With, then select Windows App. If Windows App is not offered, install it from the Mac App Store and try again.
Confirm that the dashboard status says Running. Then try a different network. Corporate, school, hotel and guest Wi‑Fi can block outbound TCP 3389 even when ordinary web browsing works.
Copy the exact username and password from the Jump‑Desk card. If needed, use Reset password while the machine is running, then download the updated RDP file before connecting with the new password.
Test a stable connection, move closer to the Wi‑Fi access point or use Ethernet, reduce display resolution and close bandwidth-heavy local activity. For a future machine, select a region closer to the usual access location.
Device redirection depends on Windows App, macOS permissions and the RDP configuration. Review the connection settings and allow the relevant macOS privacy permission. Not every specialist USB device works through remote redirection.
Keep an independent backup of important work. Deleting a Jump‑Desk permanently removes its VM, disks, public IP and stored data; a local Parallels VM can also be lost if its Mac or PVM bundle fails without a backup.
If these checks do not resolve a Jump‑Desk issue, use Jump‑IT support and identify the affected machine, network and error message.
Direct answers
Yes. The three main routes are local virtualisation, remote access to a Windows PC that already exists, and a cloud PC. Parallels Desktop runs Windows locally on the Mac; remote access controls another physical PC; Jump-Desk provisions a separate Windows 11 Pro desktop in the cloud.
It depends on the workload. Parallels Desktop runs the Arm edition of Windows 11 locally and offers strong Mac integration and offline access. Jump-Desk keeps Windows on standard cloud VM hardware, preserving Mac resources and avoiding a local Windows-on-Arm constraint. Check exact application and driver compatibility before choosing.
No. Parallels Desktop is commercial software. Standard is offered as a subscription or one-time purchase and Pro is subscription-based. Windows is licensed separately, so include both the Parallels and Windows licence in the total cost comparison.
Yes. Jump-Desk runs remotely, so the Mac needs a suitable internet connection and a network that permits outbound TCP 3389. Performance depends on connection quality and the distance to the selected cloud region.
No. A cloud desktop cannot be used without a network connection. If offline Windows access is essential, local virtualisation such as Parallels Desktop or a physical Windows computer is the more appropriate choice.
Windows 11 Pro is included with the current Jump-Desk Standard, Pro and Pro+ tiers. Parallels Desktop does not include Windows, so a separate eligible Windows 11 Pro licence is normally required for its virtual machine. An existing remote PC should already have its own Windows licence.
A Parallels virtual machine occupies local Mac or external-drive storage and grows with the Windows data and snapshots inside it. Current Jump-Desk tiers include a persistent 128 GB cloud drive and do not require a large local virtual-machine bundle on the Mac.
Jump-Desk is usually the most natural fit when Windows is needed occasionally or for a temporary project because it offers an Hours plan, includes Windows 11 Pro and does not require local VM storage. The final cost depends on region, tier, running time and checkout terms.
Current Jump-Desk Standard, Pro and Pro+ specifications do not list a dedicated GPU, so they should not be chosen for GPU-dependent gaming, rendering or similar workloads. Parallels offers supported local DirectX and OpenGL acceleration, but Apple-silicon compatibility and graphics limitations still need to be checked for each title.
Install Microsoft Windows App on the Mac, start the Jump-Desk from the Jump-IT dashboard and wait for Running status. Select Connect to download the personalised RDP file, open it in Windows App and sign in with the username and password shown on the dashboard.
The Jump‑IT Team reviewed the current Jump‑Desk tier definitions, 20-region map, VM configuration, dashboard connection instructions, billing behaviour and network rules in Jump‑IT on 17 July 2026. Local virtualisation, Apple-silicon, Boot Camp and remote-access claims were checked against current first-party vendor documentation.
Apple, Mac and macOS are trademarks of Apple Inc. Parallels and Parallels Desktop are trademarks of Parallels International GmbH. Windows, Windows 11 and Windows App are trademarks of Microsoft. Jump‑IT is not affiliated with or endorsed by Apple, Microsoft or Parallels. Product features and prices can change; current vendor documentation and live checkout terms take precedence.
SEE THE PRODUCT IN ACTION
These recordings show the current Jump-IT interface with demonstration data. Use the controls to pause, replay or view a recording full screen.
Name your desktop, choose a region and plan, and review the configuration before checkout.
Find the display settings, adapt the connection to your screen, and download the connection file.
CURRENT WORKFLOWS · SEPTEMBER 2026
A mixed-device workflow often starts with one practical requirement: a client’s desktop tool, an Access database or an Excel add-in. Check the exact application, plug-ins, drivers, licence and vendor-supported hosting environment before choosing where Windows runs. A familiar file format does not guarantee that the Mac or browser edition includes every feature. Power BI Desktop has a separate virtualisation support boundary; read the supported-environment guidance before choosing a cloud desktop.
For a Mac-first business, Jump-Teams extends that decision to the people doing the work. Pilot one representative application, invite a colleague through their own account and assign a desktop with the resources they need. Keep the Mac for everyday work and use the retained Windows workspace for the exception.
Read the business guide to invitations, roles, funding and desktop assignments.
Explore Jump-Teams →Follow a practical onboarding checklist, from a first pilot to reviewing access when a role changes.
Read the team onboarding guide →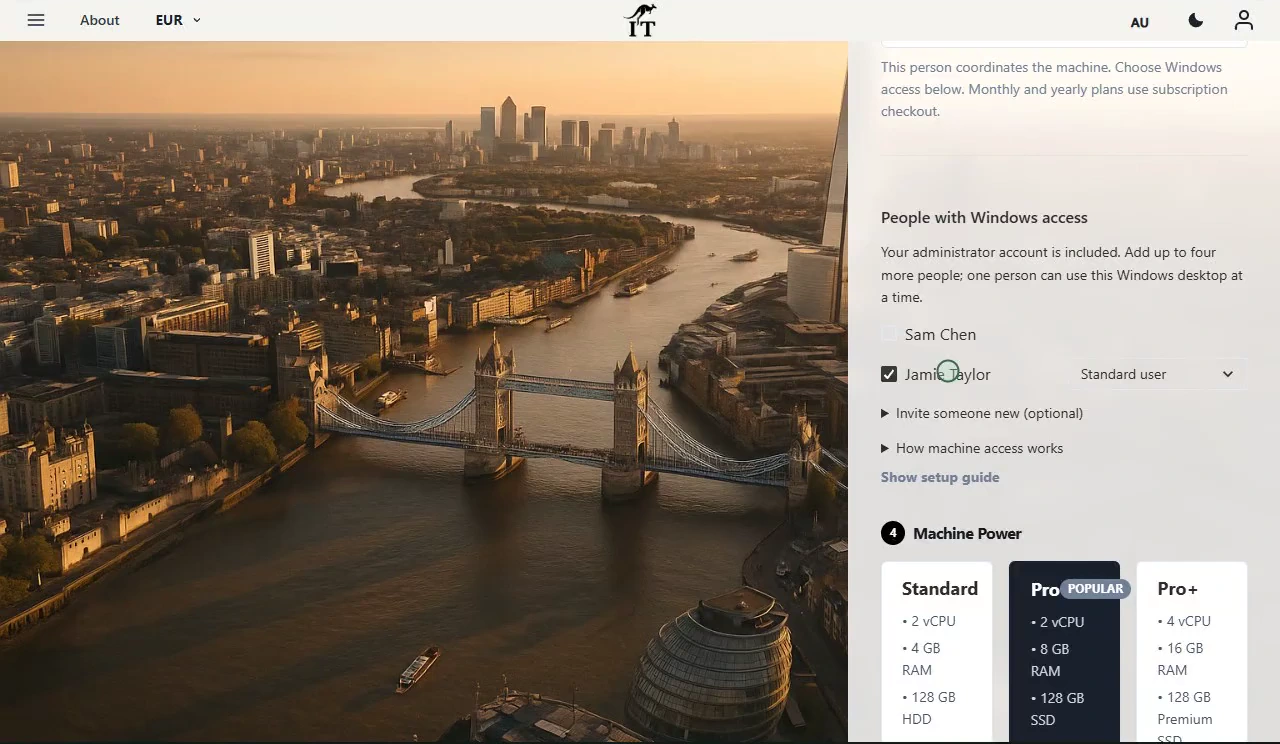
Eligible Hours desktops use prepaid funding. Compute charges apply while running, and the separate service charge continues while the desktop is retained. Stopping the desktop preserves its files and ends running compute charges; deleting it permanently removes the desktop. Review the wallet, current rates and funding permissions in Jump-IT before creating one.
For regular work, Months includes up to 300 hours of uptime per desktop each month. Review the current Years option when a longer commitment suits the requirement. Each desktop has its own plan, region and performance tier.
Compare current plans →Create a Windows 11 Pro Jump‑Desk, choose a region and performance tier, then connect from the Mac you already own.
If the project depends on Power BI Desktop, follow the application-specific Mac reporting guide. Start with its Microsoft hosting-support boundary, then check connectors, sharing, refresh and the complete cost of an appropriate environment. The guide does not establish Power BI Desktop support on Jump-IT.
Our PROLED MacBook Pro launch and hands-on guide compares Apple’s new touchscreen range with Surface Laptop Ultra and the rest of the Mac/iPad device mix. It applies this remote Windows approach to project costing and reporting, with separate colleague desktops and local AI work on the lead’s Mac. Availability begins 6 November in Apple’s announced launch markets.
Related device guidance added 31 October 2026.